Cycling glasses have evolved far beyond being just a stylish accessory. For both professional riders and casual commuters, they’re essential gear—designed to protect the eyes from wind, UV rays, dust, and glare. But behind every high-performance pair of cycling glasses is a detailed manufacturing process that balances function, fit, and visual appeal.
If you’re planning to launch your own cycling eyewear brand or upgrade your current product line, understanding how these glasses are made is critical. From material selection and lens processing to frame design, assembly, and branding, each step can impact product performance—and ultimately, your customer’s experience.
This guide will take you inside the full process of cycling glasses manufacturing, showing you what matters most, what to watch out for, and how to make informed decisions when working with suppliers or building your own specs.
What Is the Full Process of Cycling Glasses Manufacturing?
The production of cycling glasses is a multi-step process that requires precision, technical expertise, and a clear understanding of user needs. Unlike standard fashion eyewear, cycling glasses must meet higher standards for durability, comfort, and outdoor performance.
Here’s an overview of the typical manufacturing workflow:
- Product Design and Concept Development
Every cycling eyewear product starts with a clear design plan. This includes defining the target user (e.g., pro athletes, commuters, youth), the frame style, lens shape, ventilation system, and color scheme. - 3D Modeling and Prototyping
Designers turn sketches into 3D CAD models, which are used for prototype production and tooling development. At this stage, comfort, coverage, and aerodynamics are refined based on testing and feedback. - Mold Creation and Frame Injection
Molds for the frame and lens shapes are created, typically using CNC-machined steel. The frame is usually injection-molded using TR90, TPU, or Grilamid—materials known for their flexibility and impact resistance. - Lens Production and Coating
Lenses are cut from high-quality PC, TAC, or nylon sheets, then coated with multiple functional layers, such as anti-scratch, anti-fog, UV400, mirrored REVO, or photochromic tints. - Component Assembly
The lens is mounted into the frame. Temples (arms), adjustable nose pads, and anti-slip components are installed. In models with interchangeable lenses, a secure locking system (magnet, clip, or slide) is added. - Quality Control and Testing
Products undergo optical clarity checks, stress testing, anti-fog evaluation, and impact resistance verification according to global standards such as ANSI Z87.1 or EN ISO 12312-1. - Branding and Logo Application
Branding elements—such as laser-engraved lens logos, printed temple logos, or rubber patches—are added at this stage. Packaging design is also finalized. - Packaging and Fulfillment
Glasses are packed in branded EVA cases or boxes, complete with microfiber cloths, hangtags, manuals, and QR code cards. The final product is then prepared for global shipment or e-commerce distribution.
Understanding this full process not only helps you choose the right manufacturer but also enables you to control quality, cost, and delivery timelines more effectively.
Why Should You Keep Reading?
If you’re serious about building a cycling eyewear brand that stands out—either through design, comfort, or functionality—understanding each stage of the manufacturing process is just the beginning.
What really sets a product apart is in the details: the lens coatings you choose, how well your frames fit different face shapes, the way your logo is applied, and how the unboxing experience makes customers remember your brand.
In the next sections, we’ll dive deeper into each part of the production process—from design techniques to material choices, assembly tips, and branding options—to help you turn your idea into a sellable, scalable product.
How To Design Cycling Glasses? The Procedures and Components
Designing cycling glasses requires more than a cool-looking frame or stylish colors. It’s about functionality, comfort, and making sure your eyewear actually enhances the cycling experience. Below is a breakdown of the key steps and expert design tips that professionals follow when creating high-performance cycling eyewear.
4.1 Step-by-Step: How to Design Cycling Glasses
1. Define Your Target Market and Product Positioning
Are you designing for professional road cyclists, mountain bikers, urban commuters, youth riders, or prescription lens users? Your audience determines the shape, weight, color, and lens technology you’ll need. For example, pro cyclists will need aerodynamic wraparound frames, while commuters may prefer lightweight, stylish options with photochromic lenses.
2. Combine Creativity With Brand Identity
Your design should reflect your brand’s DNA. Think about color schemes, frame lines, lens shapes, and overall style. Consider questions like:
- Should the look be sporty and aggressive, or clean and urban?
- Will your product be bold and colorful, or minimal and neutral?
You want your eyewear to be instantly recognizable.
3. Create Sketches or 3D Models
Turn your concept into professional sketches or use CAD software to create a 3D prototype. Most manufacturers will need a 3D model (like STEP or STL files) to begin mold development. Good design here reduces later-stage revisions and speeds up tooling.
4. Select Lens Materials and Functional Coatings
Lens performance is one of the most important factors for cyclists. Choose materials based on the functionality you need:
- PC (Polycarbonate): Lightweight and impact-resistant
- Nylon: Flexible, high optical clarity, premium performance
- TAC: Affordable, used for polarized lenses
Popular coatings include:
- Anti-scratch
- Anti-fog
- UV400
- REVO mirror coating
- Photochromic (light-adjusting)
5. Choose a Manufacturer or Design Platform
If you lack in-house capabilities, work with professionals. You can hire industrial designers via platforms like Fiverr, Upwork, or LinkedIn, or collaborate directly with an OEM cycling eyewear manufacturer. Alibaba is also a common channel for finding tooling and mass production partners.
4.2 Design Tips & Best Practices
Frame Structure Design
- Use wraparound curves for wind protection
- Add OTG compatibility if needed (for glasses-wearers)
- Consider a modular system with interchangeable lenses
Frame Finish & Color Options
- Matte finishes are modern and scratch-resistant
- Glossy or metallic paint adds a premium feel
- Hydrographic or printed patterns allow for unique designs
Logo Placement Techniques
- Laser-etched on the lens (subtle and durable)
- Printed or silkscreened on the temples
- Woven or rubber patch on the strap (if included)
Ventilation System Layout
- Add top or side vents to improve airflow and reduce fogging
- Ensure the vents don’t affect wind resistance or lens stability
Lens Replacement Mechanism
- Magnetic quick-swap designs for pro-level products
- Snap-on/snap-out clip systems for entry-level models
- Slide-lock channels for added security in rugged terrain
By carefully planning your design with both function and brand identity in mind, you’ll create cycling glasses that not only look great but also win trust from serious riders. And that’s what keeps customers coming back.
7 Types of Cycling Glasses
Cycling glasses come in various designs, each tailored to specific riding conditions, user preferences, and price points. If you’re planning to launch a line or expand your collection, understanding the different types will help you better serve your target market.
Here are seven of the most common types of cycling glasses found in the market today:
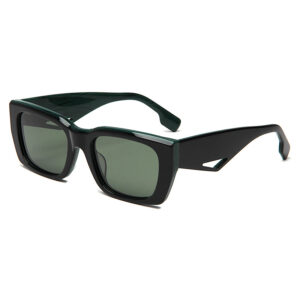
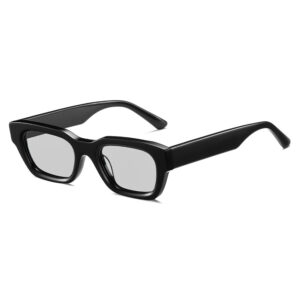
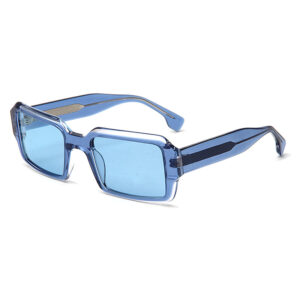
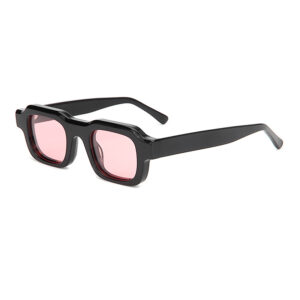
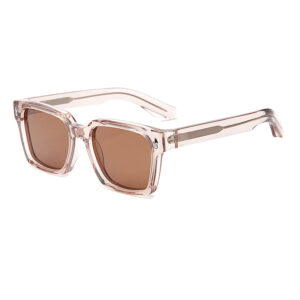
1. Wraparound Cycling Glasses
These offer full peripheral coverage, helping protect the rider from wind, dust, UV rays, and debris.
- Ideal for: High-speed road cycling and racing
- Features: Curved lens, aerodynamic frame, wide field of view
- Popular with: Professional and semi-pro riders
2. Interchangeable Lens Glasses
Designed for versatility, these allow users to switch lenses based on weather or light conditions.
- Ideal for: Riders who cycle in varying environments
- Features: Quick-swap magnetic or clip lens systems
- Benefit: One frame, multiple use cases (sunny, cloudy, night)
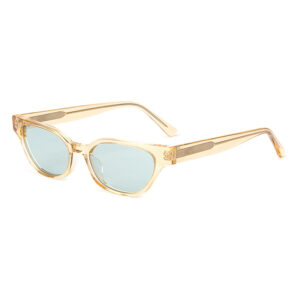
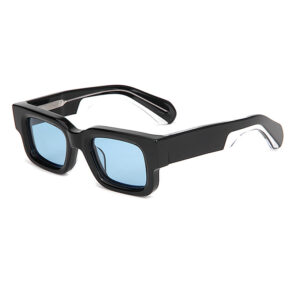
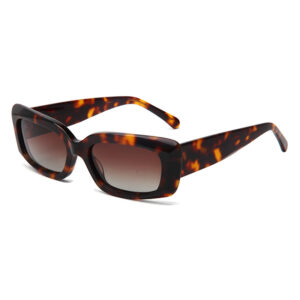
3. Polarized Cycling Glasses
These reduce glare from reflective surfaces like wet roads or car hoods, improving vision clarity.
- Ideal for: Long-distance road cycling, commuting
- Features: TAC or nylon polarized lenses
- Watch out: May slightly affect visibility of digital screens (e.g., bike computers)
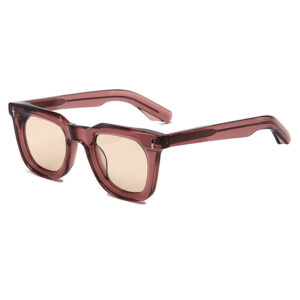
4. Photochromic (Transition) Cycling Glasses
Lenses automatically adjust their tint based on the level of sunlight.
- Ideal for: Riders who want an all-day solution without switching lenses
- Features: UV-reactive coating, often paired with anti-fog and anti-scratch layers
- Benefit: Seamless adaptation from bright sun to tunnels or dusk
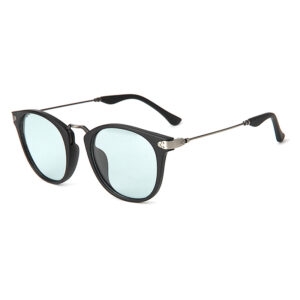
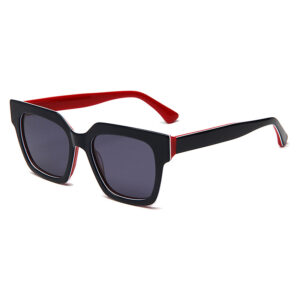
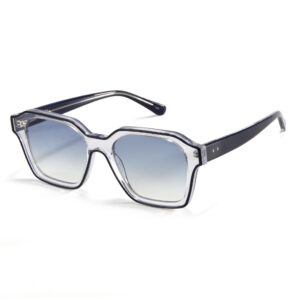
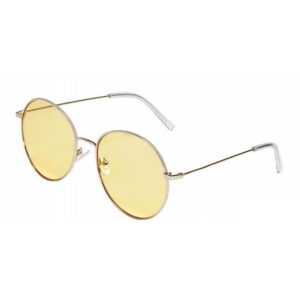
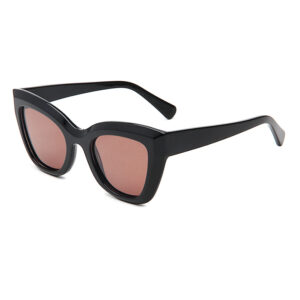
5. Urban/Commuter Cycling Glasses
Stylish, lightweight, and designed for daily use on and off the bike.
- Ideal for: City riders and e-bike users
- Features: More fashion-forward design, moderate wrap, anti-blue light optional
- Often used: As dual-purpose sunglasses for casual wear
6. Prescription-Friendly (RX Insert) Glasses
Designed to allow an internal prescription insert or custom RX lens fitting.
- Ideal for: Cyclists with vision correction needs
- Features: Internal clip system or frame-cut lenses
- Important: Lens size and airflow must be adjusted to avoid fogging
7. Youth or Junior Cycling Glasses
Scaled-down versions of adult designs, made to fit smaller faces and often with softer materials.
- Ideal for: Kids and young riders
- Features: Flexible temples, colorful designs, high UV protection
- Consideration: Safety certifications for youth gear are essential
Offering a variety of these types in your product line allows you to reach different customer segments—from elite athletes to casual commuters, from kids to adults, and everything in between.
6. Anatomy of Cycling Glasses
To design and manufacture high-quality cycling glasses, it’s essential to understand the structure and purpose of each component. Every element plays a role in ensuring the glasses stay comfortable, functional, and durable during long rides, high speeds, and changing weather.
Here’s a breakdown of the key parts that make up a typical pair of cycling glasses:
1. Lens
This is the most important functional component. It protects the eyes from UV rays, wind, debris, and glare.
- Materials: Polycarbonate (PC), Nylon, or TAC
- Features: UV400 protection, anti-scratch, anti-fog, polarized, photochromic, or mirrored coatings
2. Frame (Main Body)
The frame holds the lens in place and determines the overall fit, weight, and durability of the glasses.
- Common materials: TR90, TPU, Grilamid
- Characteristics: Lightweight, flexible, impact-resistant
3. Nose Pad (Nose Bridge Support)
The part that rests on the nose, helping to stabilize the glasses during movement.
- Often adjustable or made from soft silicone for better grip
- Design affects comfort and anti-slip performance
4. Temple Arms (Legs/Side Pieces)
These are the “arms” that hold the glasses on the rider’s head and behind the ears.
- Can include anti-slip rubber tips
- Sometimes designed with air vents or flexible hinges
5. Hinges
The connection point between the frame and the temple arms.
- Can be fixed or spring-loaded
- Affects durability and how well the glasses fold
6. Lens Replacement Mechanism
Some glasses allow the lens to be removed and replaced.
- Types: Magnetic systems, slide-in clips, snap-fit structures
- Useful for brands offering interchangeable lens kits
7. Ventilation Ports
Strategically placed openings that allow airflow to reduce fogging.
- Common placements: Above the lens, on the sides, or near the nose bridge
- Helps maintain lens clarity during intense rides
8. Rubber Inserts or Grip Enhancers
These soft components are added to the temples and nose area to prevent slipping during sweat or motion.
- Often made of silicone or thermoplastic elastomer (TPE)
Understanding how these components work together allows you to develop a product that not only looks great but also performs reliably under different cycling conditions.
7. What Materials Are Used in Cycling Glasses?
Choosing the right materials is critical in cycling glasses manufacturing. Each material affects not only the product’s performance and durability but also its price point, weight, and customer comfort. Here’s a breakdown of the most commonly used materials in cycling eyewear and why they matter.
Lens Materials
1. Polycarbonate (PC)
- Pros: Lightweight, highly impact-resistant, UV protective
- Use Case: Standard in most mid-to-high-end cycling glasses
- Why It Works: Offers excellent eye protection without adding weight
2. Nylon (PA)
- Pros: Flexible, optical clarity, durable in extreme temperatures
- Use Case: High-performance or pro-level cycling eyewear
- Why It Works: Superior distortion-free vision and lightweight feel
3. TAC (Triacetate Cellulose)
- Pros: Cost-effective, used for polarized lenses
- Use Case: Entry-level glasses or casual commuter models
- Limitations: Slightly less durable than PC and nylon
Lens Coatings & Add-ons
- Anti-fog coating: Keeps vision clear during high-exertion rides
- Anti-scratch coating: Improves durability
- UV400 protection: Blocks 99–100% of UVA and UVB rays
- Mirror (REVO) coating: Reflects glare and adds style
- Photochromic coating: Automatically adjusts tint level depending on sunlight
- Polarized layer: Reduces glare from reflective surfaces
Frame Materials
1. TR90 (Thermoplastic)
- Pros: Lightweight, flexible, durable
- Use Case: Most common choice for sport frames
- Why It Works: Offers great comfort and bendability without breaking
2. Grilamid
- Pros: Premium thermoplastic, used in high-end sports eyewear
- Use Case: Top-tier cycling eyewear collections
- Why It Works: Exceptional flexibility and chemical resistance
3. TPU (Thermoplastic Polyurethane)
- Pros: Soft, flexible, impact-resistant
- Use Case: Youth or entry-level glasses; also used in frame padding
- Why It Works: Adds comfort for prolonged wear
Other Components
- Silicone rubber: Used for nose pads and temple tips for anti-slip performance
- Stainless steel / Alloy hinges: For durability in opening and closing
- TPE (Thermoplastic Elastomer): For soft contact areas against the skin
By choosing the right combination of materials, you can balance performance, weight, comfort, and price to fit your brand’s market position—whether you’re targeting commuters, professional athletes, or everyday riders
8. Lens Processing Techniques
The lens is the most functional and visually dominant part of any cycling glasses. To ensure clarity, durability, and performance in real-world riding conditions, cycling lenses go through a series of technical processing steps. These techniques affect not only the visual quality but also the product’s positioning in the market.
Here are the key lens processing techniques commonly used in cycling glasses manufacturing:
1. Lens Cutting and Shaping (CNC or Molded)
- CNC Cutting: For precision and flexibility, especially with custom designs
- Suitable for low-volume or varied lens shapes
- Used mostly in high-end production
- Injection Molding: Used when producing high volumes of lenses
- Offers cost efficiency and consistent shape
- Requires pre-made steel molds
2. Polishing and Surface Smoothing
After cutting, the lenses are polished to ensure surface clarity and edge smoothness. This step is critical for:
- Preventing visual distortion
- Making the lens comfortable to insert into the frame
- Enhancing the overall premium feel
3. Coating Application
Lenses go through multiple coating layers depending on the target functionality:
- Anti-Scratch Coating: Increases surface durability against abrasions
- Anti-Fog Coating: Essential for high-exertion sports like cycling
- UV400 Coating: Full protection against UVA and UVB rays
- Mirror Coating (REVO): Reflective outer layer, often colorful and stylish
- Photochromic Treatment: Adjusts tint automatically in different light conditions
- Polarized Film Lamination: Reduces glare from road or water surfaces
4. Laminating Polarized or Photochromic Films (Optional)
- For polarized or transition lenses, a film is laminated between lens layers using high-pressure machinery
- Proper bonding ensures no bubbling, peeling, or clarity distortion
5. Optical Testing and Light Transmission Rate (LTR) Measurement
Before moving to assembly, lenses are tested for:
- Clarity and distortion levels
- Transmission rates (e.g. 20%, 40%) based on their tint
- Polarization efficiency (if applicable)
Manufacturers often use ISO or ANSI-certified tools for this phase.
Understanding how lenses are processed helps you select the right lens type for your collection—whether your goal is clarity for high-speed road cycling, UV protection for mountain biking, or multifunctional use in all conditions.
9. Assembly and Quality Control
Once the lenses and frames are prepared, the next critical phase is assembly, followed by a thorough quality control (QC) process. This stage directly impacts how your cycling glasses perform in real use — whether they hold up to sweat, vibration, UV exposure, and rough outdoor conditions.
9.1 Assembly Process
The assembly of cycling glasses includes several detailed steps, which vary slightly depending on the design and complexity of the product:
1. Lens Insertion
- Lenses are carefully aligned and inserted into the frame.
- For models with interchangeable lenses, mechanisms like magnets, clips, or sliding locks must be checked for precision and ease of use.
2. Temple Arm Installation
- Temples (arms) are attached to the frame via fixed or spring-loaded hinges.
- Some designs include embedded rubber tips or adjustable bends for better grip.
3. Nose Pad Attachment
- Nose pads are fixed using screws, snap-ins, or adhesive systems.
- Many models feature soft silicone pads, which may be adjustable or replaceable.
4. Branding and Logo Placement
- Logos are applied through techniques like laser engraving (lens), silkscreen printing (frame), or rubber badge insertion (temples).
- This is typically done before final cleaning and packaging.
5. Accessory Assembly (if applicable)
- Some glasses include elastic head straps, lens clips, or frame inserts for prescription lenses.
9.2 Quality Control Checks
Manufacturers perform multiple tests to ensure the product meets required standards. A well-structured QC process may include:
1. Fit & Alignment Testing
- Ensure lenses sit perfectly within the frame without gaps or distortion.
- Check for symmetrical alignment of temples and nose pads.
2. Optical Clarity Testing
- Use precision instruments to test lens clarity, UV protection levels, and polarization effectiveness.
- Ensure compliance with EN ISO 12312-1, ANSI Z87.1, or other relevant standards.
3. Functional Testing
- Test interchangeable lens mechanisms (open/close stress, secure hold).
- Check temple flexibility and resistance to pressure.
4. Anti-Fog & Scratch Tests
- Apply mist or vapor to lens surface under controlled conditions.
- Scratch resistance is tested using standardized abrasion methods.
5. Durability & Drop Test
- Simulate falls or impact to test frame resilience.
- Bend and torsion testing ensures the product won’t crack or snap under strain.
6. Final Inspection
- Visual inspection for defects (bubbles, scratches, dust inside lens area).
- Confirm logo positioning, color consistency, and overall product finish.
With proper assembly and a robust QC system, you’ll minimize returns, improve customer satisfaction, and build trust in your brand—especially among performance-conscious cyclists.
10. What Are the Measurement Points for Cycling Glasses?
When it comes to cycling glasses, fit is everything. A well-fitting frame not only ensures comfort during long rides, but also improves wind protection, prevents slipping, and enhances the overall performance of the eyewear.
Below are the key measurement points used in cycling glasses design and production. Understanding these will help you create accurate tech packs, compare samples, or communicate effectively with manufacturers.
1. Lens Width
- Definition: The horizontal width of a single lens at its widest point
- Impact: Determines field of view and peripheral coverage
- Typical Range: 65–75 mm per lens
2. Lens Height
- Definition: Vertical height of the lens from top to bottom
- Impact: Affects wind coverage and face protection
- Typical Range: 40–55 mm
3. Bridge Width (Nose Bridge)
- Definition: The distance between the two lenses at the nose area
- Impact: Affects how well the glasses sit on the nose and face stability
- Typical Range: 10–18 mm
- Note: Often paired with adjustable nose pads to accommodate multiple face shapes
4. Frame Width (Total Width)
- Definition: The total width of the frame measured from temple to temple
- Impact: Ensures compatibility with various head sizes and helmet use
- Typical Range: 135–150 mm
5. Temple Length (Arm Length)
- Definition: Length from the hinge to the end of the temple arm
- Impact: Influences grip and how the glasses wrap around the ear
- Typical Range: 120–140 mm
6. Wrap Angle (Frame Curvature)
- Definition: The curvature of the frame that wraps around the face
- Impact: Affects wind protection, peripheral vision, and aerodynamics
- Measurement: Expressed in degrees or radius curvature (e.g., base 6 or base 8 curve)
7. Face Fit Curve (Facial Contour Adaptation)
- Definition: The ergonomic curve of the frame to match the human face
- Impact: Affects comfort, slippage, and ventilation
- Note: Often refined during 3D modeling or prototype testing phase
When developing your own cycling glasses, it’s best to work closely with your manufacturer to adjust these measurements according to your target market — for example, Asian-fit designs often need a different bridge and wrap angle than European-fit models.
11. Printing and Branding Techniques for Cycling Glasses
In a competitive market, how you present your brand visually on the product can make all the difference. For cycling glasses, branding isn’t just about a logo — it’s about where, how, and with what technique your identity is applied to the product.
Here are the most common and effective branding techniques used in the cycling eyewear industry:
1. Laser Engraving on Lens
- Position: Usually on the upper or lower corner of the lens
- Advantages: Durable, scratch-resistant, sleek appearance
- Best for: Minimalist, high-end branding
- Commonly used on: Polycarbonate and nylon lenses
2. Silk Screen Printing on Frame
- Position: Side arms (temples), bridge, or nose area
- Advantages: Colorful, flexible in design and size, suitable for logos or slogans
- Durability: Medium — may fade over time if uncoated
- Pro Tip: Add a transparent UV coating for longer-lasting results
3. Woven Label or Rubber Patch on Temple
- Position: Outer or inner temple arms
- Materials: Woven polyester, silicone rubber, PVC
- Advantages: 3D branding effect, sporty look
- Best for: Youth-focused or lifestyle-oriented designs
4. Heat Transfer Logo
- Technique: Logo is printed onto a transfer sheet, then heat-pressed onto the frame or strap
- Use Case: Great for soft rubber surfaces or elastic bands
- Advantages: Clean edges, vibrant colors, good durability
5. Printed Inner Arms (Legal Info + Branding)
- Position: Inside of the temples
- Includes: Model number, brand name, country of origin, certification marks (CE, ANSI)
- Added Value: Helps reinforce a sense of authenticity and professionalism
6. Custom Nose Pad or Temple Tip Logo
- Technique: Small embossed or molded logos in rubber or silicone areas
- Use Case: Subtle, premium branding detail for high-end SKUs
- Common in: Pro-level cycling glasses or limited editions
By strategically applying branding across different components of your cycling eyewear, you can increase product value, build brand recognition, and offer customers a professional, polished look they’ll remember.
12. Packaging and Branding Essentials for Cycling Glasses
For B2B buyers and brand owners, packaging is not just protection — it’s a key touchpoint for brand communication. A well-thought-out packaging system can elevate perceived value, enhance customer experience, and strengthen brand loyalty.
Here are the most common packaging options and branding components used in cycling glasses production:
1. Packaging Options
① EVA Hard Case
- Material: Compressed EVA shell with fabric covering (nylon or polyester)
- Features: Durable, impact-resistant, ideal for premium SKUs
- Customizable: Zipper color, molded logo, inner sponge tray
- Best for: High-end or professional cycling eyewear
② Nylon/PU Soft Pouch
- Material: Drawstring pouch made from microfiber, nylon, or PU leather
- Features: Lightweight, low-cost, doubles as lens cleaning cloth
- Customizable: Silk screen logo or woven label
- Best for: Entry-level or OEM bulk orders
③ Paper Box (Color Printed)
- Material: Corrugated or rigid paperboard
- Features: Custom shape and print, insert tray available
- Best for: Retail packaging or DTC e-commerce
- Pro Tip: Consider adding QR code for brand story, authentication, or AR try-on
2. Inside-the-Box Accessories
To increase the perceived value and professionalism of your cycling eyewear, many brands include:
- Microfiber Cleaning Cloth
- Custom logo print, optional care instructions
- Interchangeable Lenses (if applicable)
- Packed in protective sleeves or slots inside the case
- Instruction Manual / Warranty Card
- Multi-language options, usage tips, and after-sales info
- Anti-fog Test Paper / Certification Insert
- Used to demonstrate lens performance and compliance (e.g., CE, UV400)
3. Personalized Branding Elements
To differentiate your cycling glasses and add a layer of trust, consider the following branding elements:
- Custom Hang Tag
- Material: Kraft paper, coated card, or recycled paper
- Info: Logo, SKU, lens tech icons, care instructions
- Woven Label / Heat Transfer Label
- Sewn or printed inside pouches or case lining
- QR Code / NFC Tag
- Directs users to your website, social media, or authenticity verification
- Custom Molded Case Logo
- Raised or debossed branding on EVA cases
In the B2B world, smart packaging and personalized branding make your eyewear more appealing to retailers, distributors, and end customers. A consistent, thoughtful presentation will help your cycling glasses stand out on shelves—or in online product pages.
13. Lens Care Instructions for Cycling Glasses
Cycling glasses are engineered for performance, but their longevity and clarity depend heavily on proper care and maintenance. Whether you’re a distributor, brand owner, or OEM buyer, including care instructions is essential for enhancing user satisfaction and reducing unnecessary after-sales issues.
Here’s a comprehensive guide to lens care that you can incorporate into your packaging or manuals:
1. How to Clean the Lenses
- Use Only the Included Microfiber Cloth
Always clean the lenses with the microfiber cloth provided in the package. It is designed to remove dust and smudges without scratching the lens surface or coatings. - Avoid Paper Towels or Clothing
Do not use tissues, napkins, or the edge of your shirt to wipe the lenses. These materials can cause micro-scratches, especially on coated surfaces. - Rinse Before Wiping
If the lenses have dirt, sand, or sweat on them, rinse with clean lukewarm water before wiping. This prevents abrasive particles from scratching the lens. - Do Not Use Alcohol or Harsh Chemicals
Avoid alcohol-based cleaners, glass cleaners, or solvents. These can damage anti-fog, mirror, photochromic, or UV-protective coatings.
2. Storage and Handling Tips
- Always Store in the Original Case
When not in use, keep your cycling glasses in the original EVA hard case or microfiber pouch to protect against scratches, drops, and pressure damage. - Keep Away from High Temperatures
Do not leave the glasses in hot environments such as inside a parked car. Excessive heat can deform the frame, damage lens coatings, or cause discoloration. - Avoid Carrying Unprotected
Don’t place the glasses loosely in backpacks or pockets with keys, coins, or other sharp objects. Use the provided case to prevent lens scratches or frame bending.
3. How to Use Anti-Fog Treatments
- Apply to the Inner Surface of the Lens
Use a specialty anti-fog spray or pre-moistened wipe. Apply a thin layer to the inside surface of the lens. - Let It Air Dry
Do not wipe the coating off immediately. Let the anti-fog layer air-dry naturally to form an effective film. - Reapply as Needed
Reapply every few rides or after thoroughly cleaning the lens for consistent anti-fog performance.
Brand Tip for Better User Experience
We highly recommend that cycling eyewear brands or suppliers include care instructions in one or more of the following formats:
- Printed user manuals inside the box
- Hangtags with care icons or QR codes
- Inner lid print on EVA cases or pouches
- A branded lens care card insert with your logo
A small detail like this not only improves customer satisfaction but also positions your brand as professional and thoughtful, especially in the competitive cycling accessory market.
Conclusion
The manufacturing of cycling glasses is a comprehensive process that brings together design, functionality, safety, and aesthetics. From material selection and structural design to lens processing, quality control, and branded packaging — every step plays a vital role in creating a product that performs and sells.
Understanding these key production stages is not only essential for product quality, but also serves as the foundation for building a cycling eyewear brand that customers trust.
Most importantly, partnering with a professional and reliable cycling glasses manufacturer is the first and most critical step toward launching a successful and scalable brand in the global market.
Ready to start your eyewear journey? The right manufacturer is waiting for your vision.