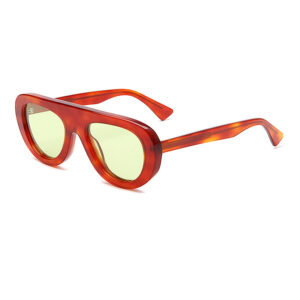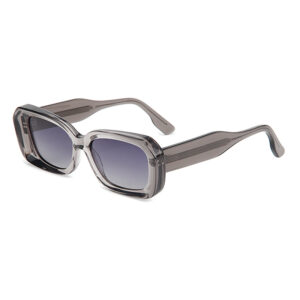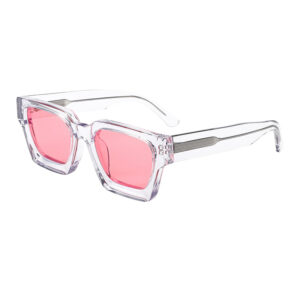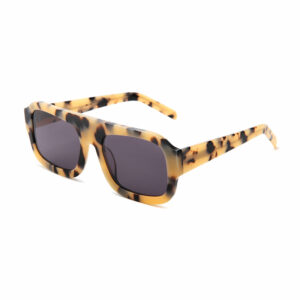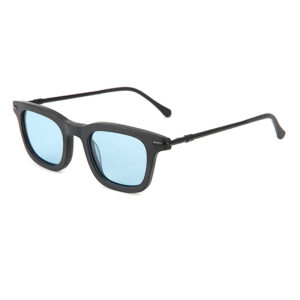
When most people think of sunglasses, they picture lenses and style. But for manufacturers and serious buyers, the real magic—and the real complexity—lies in the frame structure. Every sunglass frame is an assembly of carefully engineered parts: the bridge that determines nose fit, the hinges that control durability, the temples that carry branding and comfort, and the nose pads that affect long-term wearability.
As a sunglasses manufacturer, we know these components aren’t just details—they’re what separates a reliable, well-made product from a short-lived or uncomfortable one. In this guide, we’ll walk you through each part of a sunglass frame from a factory-level point of view. Whether you’re designing a custom line or vetting new suppliers, understanding how each piece fits, functions, and performs is essential to your success.
What Are the Parts of a Sunglass Frame?
A professional-grade sunglass frame consists of several critical components: the frame front (including the rim and bridge), temples (also called arms), hinges, nose pads, temple cores, and end tips. Additional elements like pad arms, rim screws, decorative rivets, and logo plates are often used depending on the style and construction type.
Each part plays a unique role:
- Frame front holds the lenses and defines the overall silhouette.
- Bridge connects the lenses and distributes weight across the nose.
- Nose pads affect grip and comfort on the nose bridge.
- Hinges ensure smooth opening/closing and structural stability.
- Temples provide lateral support and carry most design branding.
- Temple cores reinforce flexibility and memory shaping in acetate arms.
- End tips increase comfort and prevent slippage behind the ears.
Choosing the right materials, specifications, and assembly methods for each component is what separates a factory-grade sunglass from a fragile fashion accessory.
Now that you’ve seen the big picture, let’s take a closer look at each of these parts. From material tolerances and structural stress points to customization options and quality control standards, every component in a sunglass frame carries weight—literally and figuratively. Whether you’re customizing for fashion, sport, or luxury, understanding these details will help you build better products and make smarter sourcing decisions.
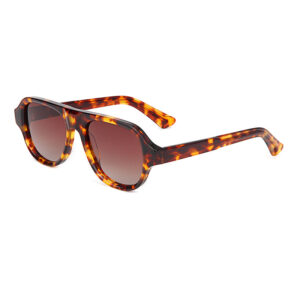
1. Frame Front: The Foundation of Every Great Sunglass
Before we talk lenses, logos, or luxury finishes, we need to talk about what truly holds a sunglass together—the frame front. Think of it as the stage where all other components perform. It’s the structural backbone and design anchor, supporting the lenses while shaping the entire look, fit, and feel of the product.
But behind the beauty of any well-made front frame lies deep engineering. In high-volume production, even a 0.1 mm shift in groove depth or bridge angle can cause poor lens fit, long-term warping, or customer discomfort. As manufacturers, we treat this part like a precision component—because it is.
Key Structural Elements (and Why They Matter)
- Rim Design
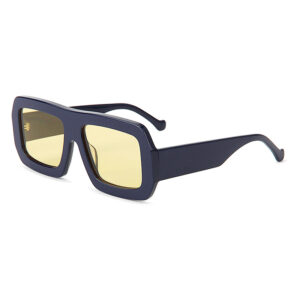
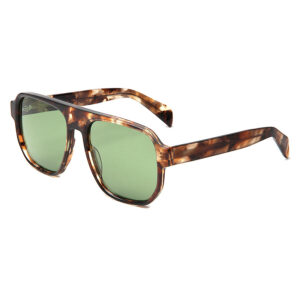
This is where form meets function.- Full-rim: Offers maximum support and design stability—especially ideal for high-prescription lenses or durable models.
- Semi-rimless: Reduces weight and creates a floating lens effect but requires exact nylon string tensioning and lens edge polishing.
- Rimless: Minimalist and elegant, but unforgiving—each hole drilled in the lens must align with frame screws within ±0.05 mm, or lens stress fractures can occur during assembly or daily use.
- Lens Groove (Lens Seat)
This internal ridge locks the lens into place. If it’s too shallow, the lens falls out. Too tight? You risk cracking during lens insertion. We machine grooves to a tolerance of ±0.05 mm to strike that perfect hold—firm, but never forced. - Bridge Integration
This isn’t just the part that sits on your nose. A well-designed bridge balances weight across both lens housings, aligns with the customer’s nasal structure, and even impacts how the whole frame flexes over time. One side even slightly lower than the other? Customers will feel it instantly.
Material & Manufacturing Decisions (Factory Logic)
- Acetate (Cellulose Acetate)
Loved by designers for its color options and tactile warmth. We often use 3–5 mm thick sheets, which can be CNC milled or pressed. But acetate is temperamental—it shrinks during curing. We pre-calculate shrinkage so final groove and bridge positions hold their geometry within 2%. - TR90 (Grilamid)
This material is every sports brand’s best friend. It’s feather-light, temperature-resistant up to 260 °C, and memory-flexible—meaning it bounces back after strain. But it requires high-pressure injection molding and careful mold-release conditioning to avoid warping. - Metal Alloys (SS, Titanium, Aluminum)
Preferred for their rigidity and polish. Metal frames go through CNC cutting and finishing stages like PVD (Physical Vapor Deposition), anodizing, or laser brushing. Titanium frames, in particular, demand high precision: the drill holes for nose pads and hinges must be laser-aligned within microns to avoid misassembly downstream.
What We Check (QC That Makes or Breaks It)
Every frame front that comes off our line goes through a tight checklist:
- Groove Uniformity – Are they consistent in depth and angle? Are there burrs that could cut into lenses?
- Surface Finish – We look for bubbles, dents, or pitting—especially in high-gloss acetate or mirror-polished metal finishes.
- Bridge Geometry – We measure bridge symmetry, ensure both lens housings are on the same horizontal plane, and confirm bridge hole alignment within ±0.1 mm tolerance. These tiny measurements prevent crooked fit and uneven lens pressure.
Bottom line: a sunglass frame front is more than what meets the eye. To us, it’s a structural system that determines everything from comfort to lens stability. When this part is engineered with precision, the rest of the frame can shine—literally and figuratively.
2. Bridge: The Unsung Hero of Fit and Comfort
If the frame front is the body of a sunglass, the bridge is its spine—and it’s often the reason a pair feels amazing… or unbearable. The bridge is the small structural connector between the two lens rims, but its impact on comfort, stability, and long-term wearability is massive.
In manufacturing, getting the bridge right requires not just symmetry and strength—it requires biomechanical understanding. Every face is different, and a misaligned or poorly designed bridge can cause slippage, pinching, red marks on the nose, or pressure headaches. That’s why this tiny component gets big attention in the factory.
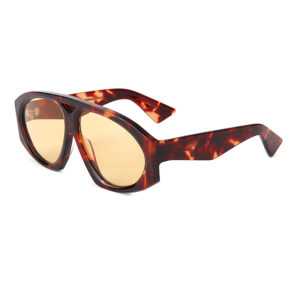
Bridge Types and What They Do
- Keyhole Bridge
Looks like an old-fashioned keyhole. It doesn’t rest fully on the nose but instead distributes weight to the sides of the nasal bridge.- Best for: People with higher nose bridges.
- In production: Requires deep, clean cuts in acetate or perfectly bent metal to achieve symmetry.
- Saddle Bridge
A wider, curved design that rests evenly across the nose. This is what you’ll often find in comfort-first or Asian-fit designs.- Best for: Broad or flatter noses.
- Manufacturing detail: Needs to match face curvature to within ±0.2 mm tolerance to avoid pressure points.
- Adjustable Bridge (in Metal Frames)
A metal core bridge that can be subtly bent or shaped post-production for fine-tuning the fit. Often used with separate nose pads.
Materials & Fabrication Techniques
- Acetate Bridges
Typically milled from one-piece front blocks. These are elegant but rigid—requiring precise molding to match diverse face shapes. Polishing and post-forming help soften pressure points. - Metal Bridges (Stainless Steel, Titanium)
Often welded or laser-soldered between two rim pieces. Strength is key here: we test bridge joins under 5–8 kg of pressure to simulate years of wear. - Hybrid/Embedded Bridges
Metal reinforcements inside acetate frames. These invisible bridges provide flexibility without sacrificing aesthetics. Critical for rimless designs where front stress must be transferred efficiently.
Precision Considerations at the Factory
- Symmetry Check:
The bridge must perfectly align left and right rims—measured with calipers to ±0.1 mm to avoid lens misalignment or tilt. - Bridge Width & Height:
These determine how the glasses sit on the face. Even a 1 mm variation in bridge width can shift fit from “snug” to “slipping.” In mass production, we pre-design bridge widths based on target face types (e.g., 16 mm for Western fit, 18 mm for Asian fit). - Flex Tolerance:
Metal bridges must flex without breaking. We perform bend tests to 25–30° under load to verify stress performance, especially in rimless or semi-rimless builds.
What Goes Wrong If Bridge Design Is Off
- Uneven pressure distribution → nose discomfort
- Poor balance → frame slides down the face
- Misaligned rims → distorted lens optics
- Cosmetic asymmetry → brand image damage
That’s why we don’t just “add a bridge” at the end. It’s planned at the CAD level, prototyped with human fit models, and refined repeatedly. A great bridge disappears when worn—but you’ll definitely notice a bad one.
In short: the bridge might be small, but its importance can’t be overstated. It’s the intersection of comfort, structure, and ergonomics. When crafted properly, it disappears into the experience—leaving only style and performance in view.
3. Nose Pads: The Tiny Parts That Make or Break Comfort
They may look like minor add-ons, but ask anyone who wears sunglasses all day—nose pads can make the difference between all-day comfort and a headache after 15 minutes. From a factory’s point of view, these small components are deceptively complex, combining material science, fit ergonomics, and mechanical stability in just a few millimeters of space.
Whether molded into the frame or attached with adjustable pad arms, nose pads are one of the most customer-sensitive components in any sunglass design. They influence not just how the frame sits, but how stable, breathable, and forgiving it feels on the nose.
Two Core Nose Pad Types
- Fixed Nose Pads (Integrated Pads)
These are usually sculpted directly into acetate or TR90 frames. Sleek, invisible, and durable—but also inflexible.- Pros: Simple, clean look.
- Cons: No adjustability, so they must be designed to fit a specific facial contour.
- Ideal for: Fashion styles, lightweight frames with low movement.
- Adjustable Nose Pads
Mounted on small metal arms (called “pad arms”), they allow micro-adjustment for height, angle, and grip.- Pros: High customizability, especially for diverse face shapes.
- Cons: Adds complexity to production, and requires high-quality joining to prevent loosening.
- Common in: Metal frames, rimless styles, and premium sport eyewear.
Material Options & Design Logic
- Silicone:
The industry’s comfort champion. Soft, grippy, and skin-friendly—ideal for sunglasses that must stay in place through sweat and heat. Comes in clear, matte, or colored options.- Shore Hardness: Usually 30–50A for optimal cushion.
- QC Check: Pressed 2,000+ times in simulated wear tests.
- Acetate Pads:
For fixed designs. Matches the frame’s look but offers less flexibility. Best for low-contact frames or fashion-first models. - Titanium / Stainless Steel Pads:
Found in high-end or minimalist designs. Durable and sleek, but cold to the touch and harder under pressure.- Often used with hypoallergenic coatings.
- Air-Cushion Pads:
A premium segment of silicone pads that feature air pockets for extra bounce and softness.- Loved by wearers of heavy prescription sunglasses.
Pad Arm Construction (For Adjustable Pads)
The pad arm may look like a wire, but it’s a precisely engineered spring steel or titanium component.
- Tension Test: Arms must bend 1,000+ times at 20–30° without losing position.
- Solder Quality: The connection between pad arm and frame front must withstand 8–10 kg pull force to avoid pad detachment.
- Angle Calibration: Done during final QC to ensure symmetrical pad position and balance on the nose bridge.
Critical QC & Fit Considerations
- Pad Height & Spread: Dictates how high the frame sits on the face. A 1 mm difference can make a sunglass sit crooked.
- Skin Compatibility: Pads must be free from BPA and phthalates if marketed as hypoallergenic.
- Adhesion Strength: Silicone pads are often friction-mounted or lightly glued—QC ensures zero slippage after prolonged wear.
Why Nose Pads Are a Hidden Risk (If Ignored)
- Misaligned pads → tilted frames and misaligned lenses
- Unstable pad arms → annoying shifting, especially when sweating
- Uncomfortable materials → red marks, skin irritation, or returns
At our factory, nose pads aren’t a last-minute add-on. We plan their placement from the CAD stage, test prototypes on real faces, and specify exact pad hardness and mounting method by market (Western vs. Asian fit). Why? Because when a frame fits the nose well, customers forget they’re even wearing sunglasses.
In summary: nose pads are a perfect example of “small part, big impact.” For premium feel, long wear, and brand reputation, these details matter more than most people realize—and your factory partner needs to treat them that way.
4. Hinges: The Engineered Pivot Behind Every Pair of Sunglasses
You might open and close your sunglasses 10 times a day without thinking twice—but your factory certainly doesn’t. The hinge is where your sunglass lives or dies in the long run. It’s not just a mechanical joint; it’s the most stressed and repeatedly used component of the entire frame.
When hinges fail, the product fails—regardless of how beautiful the design is. As manufacturers, we obsess over hinge design, materials, and durability because we’ve seen what happens when it’s overlooked: loose temples, cracked frames, or even customer injury.
Types of Hinges in Sunglass Manufacturing
- Standard Barrel Hinges
This is your go-to hinge system: small cylindrical barrels stacked like interlocking fingers, secured with a screw.- Common in: Both acetate and metal frames.
- Specs: Typically 3-barrel or 5-barrel. Barrel alignment tolerance ≤ 0.1 mm.
- Benefits: Reliable, easy to replace, cost-effective.
- Spring Hinges
These feature an internal spring mechanism that adds flexibility to the temple arm. Great for comfort and grip.- Ideal for: Wearers who take sunglasses on and off frequently.
- Challenge: Requires micro-precision assembly. Spring travel must be smooth and durable past 20,000+ flex cycles.
- Hidden or Embedded Hinges
Sleek, modern, and minimal. These are embedded inside the temple or front without visible screws.- Used in: High-end or fashion-forward frames.
- Notes: Alignment must be perfect; any torque inconsistency leads to uneven temple movement.
- Ocular Hinges for Rimless
These ultra-compact hinges directly connect to lens holes in rimless frames.- Specs: Lens drill point and hinge post must align to ±0.05 mm.
- Risk: Even small drilling errors can lead to lens fractures under stress.
Materials That Make a Difference
- Stainless Steel (SS 304 / 316L)
Durable, corrosion-resistant, and strong enough for high-tension applications. Often used in standard and spring hinges.- PVD Coated or Nickel-Plated for aesthetics and rust resistance.
- Titanium Hinges
Lightweight and ultra-strong, but trickier to machine. Common in luxury or performance frames. - Alloy Cast Hinges
Often used in budget eyewear. Lower precision, lower cost—but more prone to wear.
What We Test Before It Leaves the Factory
- Fatigue Testing:
We simulate 10,000–50,000 open-close cycles to confirm spring tension and barrel wear resistance. - Torsion Stability:
Both sides must open/close symmetrically. Tolerance: ≤5° deviation under 2N force. - Pull Strength:
Screws and barrels are stress-tested to at least 8 kg pull resistance to ensure temple won’t detach during impact. - Noise and Smoothness:
A creaky hinge? That’s a dealbreaker. Smooth movement and silence = premium.
Why Hinges Often Get Overlooked (But Shouldn’t)
- Aesthetic-focused designs often forget mechanical load.
- Spring hinges improperly installed can jam or squeak within weeks.
- Low-grade barrels wear fast, causing wobble and lens misalignment.
We take hinge design seriously from the start. During CAD prototyping, we simulate hinge torque, stress distribution, and temple swing range. We choose hinge type not just by cost, but by how the frame will be worn, stored, and folded in real life.
Bottom line: Hinges may be small, but they carry the full weight of wear and tear. Well-engineered hinges mean long-lasting sunglasses that your customers will trust, use, and recommend. And in wholesale or private label markets, hinge durability often decides your return rate
5. Temples: Where Form, Function, and Branding Come Together
The temples—commonly known as the arms—are more than just the parts that wrap around your ears. They are structural supports, balance points, design statements, and brand billboards all at once. In fact, the temples are usually the second part of sunglasses that customers notice… and the first they complain about when something goes wrong.
From a factory’s perspective, temples are an intricate fusion of mechanics, ergonomics, and design logic. They must flex without cracking, return to shape after strain, and hold their form even in humid climates or under prolonged UV exposure.
Temple Structure & Key Components
Each temple consists of:
- Temple Body – The visible outer material (acetate, TR90, metal, or hybrid).
- Core Wire / Reinforcement – Hidden inside to give the temple its flexibility and memory.
- End Tips / Ear Pieces – The curved area that hooks behind the ear for grip.
- Decorative Elements – Logos, plaques, metal inlays, or embossed textures.
Temples also connect to the hinge at one end and apply light tension around the wearer’s head for a secure but comfortable fit.
Material Options and Their Behavior
- Acetate Temples
Offer excellent visual appeal and color flexibility. Acetate is warm to the touch and easy to adjust with heat.- Requires: Internal metal core for structural support.
- Ideal for: Fashion lines, vintage styles, and frames where branding is visible.
- TR90 / Nylon Temples
Molded in one piece, they’re extremely flexible, lightweight, and impact-resistant.- Ideal for: Sportswear, youth collections, and hot climates.
- Metal Temples (SS / Titanium)
Thin, durable, and used in minimalist or luxury frames. Often paired with acetate end tips for comfort.- Challenges: Needs precise spring resistance and weight balance to avoid pinching.
- Wood / Carbon Fiber / Hybrid Temples
Popular for eco or boutique brands. These materials offer visual uniqueness but require special joining techniques and reinforcement to avoid cracking.
Core Wire (Temple Reinforcement)
Most acetate or wood temples are internally supported with core wires:
- Material: Spring steel, copper-nickel alloy, or titanium.
- Shape: Flat, round, twisted, or custom-milled for specific flex profiles.
- Purpose: Allows temples to be bent during fitting (optical shops) and return to their ideal form.
Key QC: Core wire should be centered along the temple length, not visible through the acetate, and securely bonded to avoid “bubbling” under heat.
Factory QC and Engineering Details
- Temple Length Precision:
Standard ranges from 135 mm to 150 mm. ±0.5 mm tolerance ensures both sides match. - Opening Angle:
Temple spread should be consistent (usually 90–105° from frame front), or the fit will be uneven. - Tension Test:
Temples must endure 10,000+ open-close cycles with ≤5% fatigue. - Brand Logo Integration:
Metal logos or laser engravings must be positioned precisely—often within 0.2 mm deviation—for consistent branding.
Common Temple Issues (and How We Prevent Them)
- Loose Fit – Often from inconsistent core wire placement or improper hinge angle.
- Color Fading – Solved with UV-stabilized acetate or TR90 pellets.
- Cracking at the Hinge Joint – Prevented by reinforcing temple ends during injection or heat pressing.
We engineer every temple to match not only the frame’s aesthetic but also the wearer’s lifestyle. A streetwear sunglass should hug the ears during movement; a luxury frame should feel feather-light but stable; a sports model must resist sweat, sun, and stretch.
In short: temples are the part of your sunglasses that stay in constant motion and full view. When manufactured with precision, they deliver the durability and design that keep customers loyal—and brands iconic.
6. Temple Core: The Hidden Backbone Inside Every Arm
You can’t see it. Most customers don’t even know it exists. But inside most acetate or wood sunglass temples lies the temple core—a slim, metallic reinforcement that silently does all the heavy lifting.
From a manufacturer’s point of view, the temple core isn’t optional. It’s the spine that makes adjustments possible, ensures long-term structural integrity, and prevents warping or snapping after months of real-world use. Without a properly engineered core, even the most beautiful temple is just cosmetic.
What Is a Temple Core, Exactly?
- A metal wire or strip embedded inside the temple body (especially acetate or natural materials).
- Positioned with millimeter-level precision during lamination or injection molding.
- Usually runs the full length or 80% of the temple, depending on design and balance.
Material Options and Selection Logic
- Spring Steel:
The most common and flexible. Offers good “memory” for repeated adjustments.- Tensile Strength: ~800–1,200 MPa
- Common in: Optical and sunglasses with frequent fit adjustments.
- Titanium Wire:
Stronger and lighter, ideal for luxury frames or hypoallergenic needs.- Bonus: Corrosion-resistant even in tropical humidity.
- Nickel-Silver Alloy:
Easy to machine, suitable for mid-range models. Slightly less elastic than spring steel. - Custom-Shaped Core (Flat / Twisted / Grid):
Used for design-driven projects. These cores not only strengthen but add visual impact (when semi-visible under translucent acetate).
Engineering Details That Matter
- Placement:
Core must be centered along the temple to avoid twisting during bending. A 1 mm misalignment can cause the temple to curve awkwardly. - Bonding:
The core is either heat-bonded during lamination or fixed using adhesive during injection. Poor bonding leads to “core shift,” where the temple outer surface looks bubbled or uneven. - Visibility:
In transparent acetate frames, the core becomes a visual element. This means:- Polished finish or texture is intentional
- Logo etching or brand pattern may be engraved
- Tip Termination:
The core must stop at least 5 mm before the temple end tip to prevent sharpness or discomfort.
Why the Temple Core Is Essential for Fit and Durability
- Shape Memory:
Without it, temples lose their shape after minor flexing. The core allows temples to be heated and bent—then hold that shape for months or years. - Anti-Warping:
Especially in hot, humid, or dry climates, the core stabilizes materials like acetate or wood, preventing twisting or shrinking. - Customization Potential:
Some brands add decorative cores with etched brand names, grid textures, or color-coated finishes visible under light acetates—merging function with fashion.
Common Issues (and Factory Fixes)
- Core Shift: Happens when the core moves during molding. Prevented by secure pre-fixing and correct cooling time.
- Uncentered Core: Causes uneven bend during adjustment. Solved through optical scanning during pre-assembly.
- Corrosion in Humid Markets: Avoided by using titanium or nickel-free alloys.
At our factory, temple cores are never an afterthought. They’re specified during the CAD stage, tested in 500-cycle bending simulations, and checked for bonding adhesion before and after shaping.
In short: the temple core may be hidden, but it’s crucial. It ensures that your sunglass arms not only look good—but behave well, feel stable, and last longer. Great temples start with a great core.
7. End Tips: The Last Touch That Makes Sunglasses Stay in Place
No matter how perfect the design, how luxurious the material, or how sleek the logo—if your sunglasses slip off your ears every 10 minutes, customers will stop wearing them. That’s where end tips, or ear pieces, come in.
These are the curved or extended parts at the end of each temple, wrapping gently behind or above the ear to anchor the frame in place. At the manufacturing level, end tips must balance ergonomics, material comfort, and brand styling—all within a few centimeters of frame real estate.
Functional Roles of End Tips
- Retention – Holds the sunglasses in position during head movement, especially in sports or outdoor use.
- Comfort – Prevents pressure points behind the ears or on the skull base.
- Adjustability – Allows temples to be bent slightly inward or outward without causing stress fractures.
- Style & Branding – End tips can be color-matched, engraved, debossed, or fitted with metallic accents to elevate brand presence.
Materials & Manufacturing Options
- Acetate End Tips
Common in classic designs. Warm to touch, visually premium, and moldable under heat.- Needs internal shaping: Core wire must stop before the tip to allow thermal bending.
- Finishing: Often hand-polished for comfort.
- TR90 / Nylon Tips
Used in sporty or injection-molded frames. Slightly rubbery texture improves grip, especially in activewear.- Often co-molded with temple for seamless look.
- Rubber / Silicone Tips
Ultra-comfortable and non-slip. Found in performance eyewear or Asian-fit designs.- Anti-sweat, soft-touch, and UV-resistant coatings often applied.
- Metal Tips with Plastic Sleeves
Seen in minimalist or high-end thin temples. Durable, sleek, and often engraved with brand initials.
Engineering & Fit Considerations
- Tip Length & Curve
Most temples are 135–150 mm long, with the final 15–30 mm forming the end tip curve. The curvature must match standard human ear geometry (usually 25–35° inward turn). - Core Wire Positioning
The metal core must end before the tip to allow for bend adjustments. If not, the temple may snap during adjustment. - Welded vs. Slip-On Tips
- Slip-on tips allow for post-production customization or replacement.
- Molded tips offer better water resistance and seamless aesthetics.
- Brand Finishes
Many brands use the end tip as a signature zone: adding small metal logos, embossed symbols, or unique color flourishes visible when the arms are open.
Common Issues (and How We Solve Them)
- Slipping during wear – caused by wrong curvature or slippery materials.
Fix: Choose anti-slip rubberized tips or custom-fit Asian/Western geometries. - Pressure discomfort – from poor angle or rigid end materials.
Fix: Optimize tip radius and material softness (Shore 30–50A for rubber tips). - Color mismatch or fading – especially in transparent acetate models.
Fix: Use UV-stable pigments and bonded pigments during tip extrusion.
In short: end tips are your sunglasses’ handshake with the wearer’s skin. When soft, stable, and subtly stylish, they create a wear experience that feels invisible. When done wrong—they’re the first reason your frames get left in a drawer.
8. Decorative Elements & Logo Zones: Where Identity Meets Engineering
While lenses and frames determine how sunglasses perform, it’s the logos, plaques, and metallic inlays that make people remember your brand. These are not just visual touches—they’re physical signals of trust, style, and brand authority. And they must be integrated carefully, because decorative elements affect production processes, material behavior, and long-term durability.
As a factory, we’ve seen how a poorly bonded logo or off-center plaque can ruin an otherwise flawless pair of sunglasses. These tiny details demand precise engineering and well-thought design integration.
Common Decorative Elements in Sunglasses
- Metal Logos
Laser-cut, etched, or stamped metal pieces embedded into temples or end tips.- Popular for: Premium, designer, or luxury brands.
- Fixing method: Heat-pressed into acetate or glued into pre-routed TR90 slots.
- Printed or UV-Cured Logos
Applied to lens surface or temples. UV ink is used for precision and resistance to fading.- QC concern: Ink adhesion under sweat, heat, or alcohol wipes.
- Laser Engraving
Used on metal frames or temple cores visible through clear acetate.- Clean and lasting, but requires fine beam calibration to avoid burning surrounding materials.
- Hot Stamping / Foil Embossing
Heat and pressure used to imprint metallic foil logos onto acetate.- Effects: Glossy, matte gold/silver, or custom Pantone foil.
- Challenge: Proper pressure and alignment needed to avoid double edges or fade.
- Decorative Rivets / Studs / Pins
Functional or faux-functional metal parts placed on the front or temples for a classic or industrial look.- Often used to mimic vintage styles (e.g., keyhole bridges or Wayfarer designs).
- Inlays (Wood, Carbon, Crystal, Leather)
Material accents embedded into the temple or front. Unique textures elevate perception.- High QC demand: Inlay thickness, adhesion, and heat expansion compatibility.
Key Zones for Branding & Decoration
- Temple Outer Surface
- Most visible zone for brand logos, especially in acetate designs.
- Can carry logos, text, slogans, or metallic branding.
- End Tips
- Small but effective spot for subtle branding, especially in luxury models.
- Lens Corner
- Brand name, UV category, or limited-edition info can be etched, laser marked, or pad printed.
- Bridge or Nose Pad
- Often used in high-end frames for “hidden luxury.” Titanium nose pads with engraved initials are a growing trend.
Production & QC Details
- Positioning Accuracy: Logos must be aligned with CNC or laser references. Misalignments over ±0.3 mm are immediately flagged.
- Bonding Strength: Metal logos are tested for peel resistance and shock durability (drop test, pull test).
- Ink / Foil Durability: Must pass sweat resistance (synthetic sweat test), UV resistance, and alcohol wipe rub tests.
Common Branding Mistakes (and Our Fixes)
- Logo Peel-Off – Happens with low-adhesion glue or untreated base surface.
Fix: Use pre-textured surface + 3M adhesives or hot insert press. - Fading Prints – Especially on lenses or rubber tips.
Fix: Use UV-cured inks and high-temperature baking post-printing. - Off-Center Embossing – Happens when hot stamping is done manually or with faulty alignment plates.
Fix: Switch to digital alignment with template jigs and pressure-mapping.
In summary: decorative elements may seem small, but they speak loudly. They carry your brand’s identity in a space only a few millimeters wide—so accuracy, durability, and intentional design matter more than ever.
9. Screws, Pins & Joining Hardware: The Invisible Strength Behind Every Sunglass Frame
Behind every moving temple, rimless lens, or spring hinge lies a quiet workhorse—the screw or pin holding it all together. These components may be just a few millimeters long, but they carry more structural responsibility than any other part in the frame.
As eyewear manufacturers, we treat hardware selection and installation as precision engineering, not a basic assembly step. The wrong screw torque or poorly finished rivet can lead to rattling hinges, misaligned lenses, or even broken arms after a few weeks of use.
Types of Hardware Common in Sunglasses
- Hinge Screws
Connect temple to frame front via the hinge barrels.- Common sizes: M1.2, M1.4, M1.6 thread diameter
- Material: Stainless steel or nickel-plated brass
- Add-on: Thread-locking (Loctite) to prevent loosening over time
- Rim Screws
Used in semi-rimless or rimless frames to secure lenses.- Needs exact torque: Over-tightening = lens cracking; under-tightening = lens loosening
- Often combined with: Nylon or silicone washers to reduce stress on lens
- Rivets / Decorative Pins
Serve both as structural fasteners (in metal/acetate hybrid frames) and visual accents.- Must be flush-mounted: Uneven height causes skin irritation or aesthetic defects
- QC concern: Crimp tightness and symmetry
- Pad Arm Rivets or Screws
Hold the nose pad arm in place.- Need secure but adjustable fitting to enable pad customization
- Tested for: Rotation resistance after 2,000 flexes
- Flex Spring Assembly Pins
In spring hinges, specialized pins retain internal springs.- Precision required: Insertion angles and depths must be exact, or tension imbalance occurs
Materials and Finishing
- Stainless Steel (304, 316L)
Corrosion-resistant and durable—ideal for long-term structural use, especially in humid or tropical climates. - Brass + Nickel Plating
Easier to machine, often used in decorative applications. Plating adds corrosion resistance. - Titanium Screws
Lightweight, hypoallergenic, and strong. Ideal for premium or sport models. Requires precise threading tools. - PVD Coating / Black Oxide Finishes
Enhance appearance (e.g., blacked-out hardware) while improving surface hardness and resistance to scratches.
Installation & QC Best Practices
- Torque Control
We use electronic or torque-limiting screwdrivers set to exact Newton values (typically 0.02–0.1 Nm) to avoid overtightening. This prevents thread stripping or lens pressure. - Threadlocker Application
Especially for hinge screws, a micro-drop of Loctite prevents loosening after months of daily open-close cycles. - Washer Check
In semi-rimless and rimless models, missing nylon washers are a top cause of early lens cracking. - Flush Finish & Symmetry
All rivets and screws must sit flush with the frame surface. Offset >0.3 mm triggers manual rework in QC.
Common Hardware Failures—and Our Fixes
- Screws loosening after a few weeks of use
Fix: Proper thread treatment + torque calibration during assembly - Rivets protruding unevenly from temple sides
Fix: Precision depth control during press-in process - Stripped threads due to over-torque or poor plating
Fix: Replace with titanium or steel hardware + revised tool heads
Bottom line: if hinges are the joints of a sunglass, screws and pins are the ligaments. Quiet, invisible, but completely essential for strength, reliability, and long-term customer satisfaction.
10. Lens Seating & Assembly: Where Precision Protects Vision
No matter how beautiful the frame or stylish the silhouette, a sunglass is ultimately defined by one thing—the lenses. And more specifically, how well those lenses are secured into the frame. The lens seating and assembly area is where the artistry of design meets the exactitude of optical engineering.
From our factory perspective, this is one of the most critical control points in the entire production process. A lens that doesn’t sit flush, that rattles, cracks under pressure, or is misaligned by even 0.1 mm, can damage your brand’s reputation faster than any logo can fix.
Key Elements of the Lens Seating Zone
- Lens Groove (Rim Groove)
The U-shaped track inside the front rim that holds the lens edge.- Standard width: 0.5–0.8 mm depending on lens edge thickness
- Tolerance: ±0.05 mm to ensure firm hold without inducing stress
- Machining method: CNC router, ultrasonic knife, or pre-molded in injection process
- Bevel Angle
The inner angle of the groove must match the edge cut of the lens—usually 10–15° inward bevel for a snap-fit.- Mismatch risks: Lens will either sit loose or resist fitting and crack under pressure.
- Lens Seating Surface
The base plane inside the rim (behind the groove) must be smooth and even.- Surface flatness: ≤0.1 mm variance across the curve to avoid optical misalignment
Lens Insertion Techniques (Based on Frame Material)
- Acetate / TR90 Snap Fit
Frame is heated slightly, and lenses are gently pressed into place. As the frame cools, it shrinks to lock the lens in.- Advantage: No screws, seamless look
- QC check: Ensure no stress lines or white marks around lens edge
- Metal Screw Fit
Used in semi-rimless and full-metal frames. Lenses are slid into rim, then secured with a micro screw.- Needs nylon bushings to protect lens from vibration
- Rimless Mounting
Involves drilling precision holes in lenses, then fixing via screws, bushings, and metal mounting posts.- Drill accuracy: ±0.05 mm; failure can cause lens cracking or visual distortion
- Assembly: By hand or semi-automated for high-end models
Adhesive and Sealant Use (Optional Cases)
In some specialty or hybrid frames, especially with complex shapes:
- Optical adhesive (UV-cured) may be used to supplement hold
- Silicone edge strips can prevent rattle in loose grooves
- These are tested for:
- UV resistance
- Temperature cycling
- No chemical seepage or edge yellowing over time
Critical QC Touchpoints
- Lens Centering
Both lenses must sit equidistant from the bridge centerline within ±0.2 mm. - Stress Testing
Frames are dropped from 1.5 meters to confirm lenses don’t pop out or crack. - Rattle Test
Each finished pair is lightly shaken and checked acoustically—any clicking or play triggers re-seating. - Surface Cleanliness
No adhesive smears, dust inside rim, or edge chipping allowed.
Common Assembly Errors (And Solutions)
- Lens Cracks – Often from improper groove width or high insertion force.
Fix: Adjust bevel angle + confirm CNC calibration. - Misalignment – Can distort optics and hurt eyes.
Fix: Precision jigs used during seating process. - Rattling Lenses – Usually caused by undercut groove or shrinkage post-molding.
Fix: Reinforce with silicone strips or re-cut groove.
In short: the lens seating area may be the final step in assembly—but it’s the first place customers will notice if something’s off. Get this right, and your sunglasses don’t just look great—they function with confidence.
Conclusion: Great Sunglasses Begin With Great Engineering
From the frame front that sets the tone, to the lens groove that locks in clarity, every part of a sunglass frame is a balance of design, function, and durability. The materials you choose, the tolerances you control, and the craftsmanship you demand all directly affect how your eyewear will feel in the customer’s hand—and on their face.
In the B2B eyewear world, success is never about one single feature. It’s about how hinges flex without fail, how temples hold shape under stress, and how lens seating stays silent and secure. When you understand the manufacturing logic behind each part, you’re not just buying sunglasses—you’re investing in a reliable product that speaks your brand’s quality with every wear.
So whether you’re sourcing from China, Italy, or the USA, make sure your supplier treats every part—from nose pads to end tips—with the respect they deserve. That’s the difference between average and exceptional.