I. Introduction
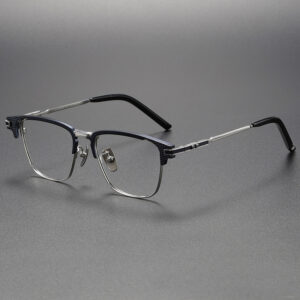
Eyewear, as an indispensable tool in our daily lives and a fashionable accessory, involves a complex and precise manufacturing process. At the heart of this process lies the creation of molds, which are crucial in determining the shape, size, and quality of the final product. The quality of mold manufacturing directly reflects the technological strength and product competitiveness of an eyewear production company.
While molds play such a vital role in eyewear production, the process behind their creation remains unfamiliar to most people. In this article, we will take you through the entire manufacturing process of eyewear molds. From analyzing design requirements to selecting materials, and from precision machining to heat treatment, all the way to the final stages of trial molding and production, every step is essential and filled with technical and artistic wisdom. Through this detailed exploration, we aim to give you a comprehensive understanding of the eyewear manufacturing process and a deeper appreciation of the critical role molds play within it.
II. Mold Design Phase
Mold design is the starting point of the entire manufacturing process and arguably the most critical step. The quality of the design directly influences the final product’s quality and production efficiency. A well-executed mold design not only ensures the precision of the product’s dimensions and appearance but also significantly boosts production efficiency while reducing costs. Therefore, the design phase requires substantial effort and time to ensure the mold operates efficiently and stably in subsequent production stages.
1. Design Requirement Analysis
The first step in mold manufacturing is the analysis of design requirements, which serves as the foundation of the entire process. During this phase, designers must engage in in-depth communication with clients to thoroughly understand their specific needs. These requirements often encompass various aspects such as the shape, size, material, and surface treatment of the eyewear frame. For clients, their needs are typically driven by market trends, target customer preferences, and brand positioning. Designers need to translate these needs into actionable design plans.
During the analysis, designers must understand both the explicit and implicit needs of the client. For instance, a client may desire a trendy and innovative frame design but might not have specific requirements for production processes and costs. In such cases, designers must leverage their experience and technical expertise to offer suitable suggestions and balanced solutions that meet the design requirements while controlling production costs. Additionally, designers must consider the functional aspects of the eyewear, such as comfort, durability, and lightweight, which are essential factors in the design.
To ensure the accuracy of the requirement analysis, designers typically create detailed design documents that align the client’s needs with technical specifications, forming a clear design direction. These documents not only provide a foundation for subsequent design work but also set clear expectations for the client. By investing time and effort in this phase, designers can avoid potential pitfalls, enhance design efficiency, and ultimately improve the quality of the final product.
2. 3D Modeling
After completing the requirement analysis, the design phase advances to 3D modeling. This is a critical step in mold design, where designers use CAD (Computer-Aided Design) software to create a three-dimensional model of the mold. This process demands meticulous attention to detail, as every aspect of the mold must be accurately represented in the model.
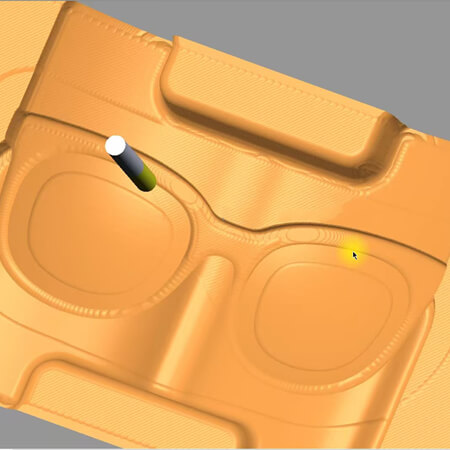
3D modeling is not just about visualizing the design but also about verifying its feasibility. By creating a 3D model, designers can intuitively see how different parts of the mold fit together and anticipate potential issues. For example, the model can simulate the flow paths of materials, the cooling process, and the mold’s opening and closing actions, allowing for optimization before actual production begins. Moreover, 3D modeling software can perform mechanical analyses to ensure that the mold can withstand the high temperatures and pressures of the production process, preventing deformation or damage.
In addition to modeling itself, the 3D modeling phase involves addressing numerous intricate details. These include the design of parting surfaces, the layout of venting systems, the placement of ejector pins, and more. Designers need to continuously refine the model, conducting multiple simulations and tests to ensure that every detail meets the design requirements. The finalized 3D model will serve as a precise guide for subsequent mold manufacturing.
Furthermore, 3D modeling provides a visual representation of the mold that is easier for the manufacturing team to understand compared to traditional 2D blueprints, reducing the risk of misinterpretation. This approach not only improves the precision of the design but also simplifies the manufacturing and assembly process, enhancing overall project efficiency.
3. Mold Flow and Cooling System Design
The design of the mold flow path is particularly important in the manufacture of plastic eyewear. The flow path refers to the channels through which plastic material moves within the mold. A well-designed flow path ensures that the plastic material is evenly distributed throughout the mold, preventing defects such as bubbles, voids, or incomplete formations. Therefore, the rationality of the flow path design directly impacts the quality of the final product.
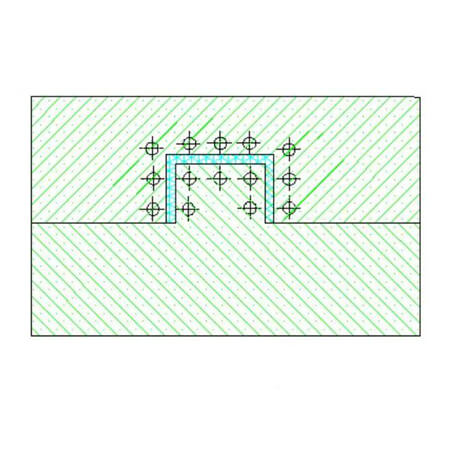

Designing an efficient flow system requires consideration of multiple factors. First is the type and flow properties of the plastic material, as different materials have varying requirements for flow path design. For example, certain materials flow better at high temperatures, allowing for longer or narrower flow paths, while others may require shorter or wider channels. The shape and size of the mold are also important, as complex molds may need multiple flow paths to ensure even material distribution. Additionally, the cross-sectional shape, length, and angle of the flow channels all influence material flow speed and pressure loss. Designers typically use computer simulation software to test different designs and find the optimal solution.
The cooling system is another crucial aspect of mold design. Its purpose is to remove heat from the mold efficiently, preventing overheating that could lead to product deformation or quality issues. An efficient cooling system can significantly shorten production cycles and improve production efficiency. Therefore, cooling system design must be precise. Designers consider factors such as the material’s thermal conductivity, coolant flow rate, and overall mold structure to ensure even heat dissipation without causing uneven or excessive cooling.
When designing the cooling system, designers must also plan the layout of cooling channels and select appropriate cooling media. Cooling channels are typically placed around critical areas of the mold, such as near the flow paths or high-temperature regions, to maximize cooling efficiency. The choice of cooling media—often water or oil—depends on production requirements, as water offers higher cooling efficiency but may cause surface oxidation, while oil provides lower cooling efficiency but is better suited for certain materials.
III. Material Selection and Initial Processing
After completing the mold design, the next steps involve selecting suitable materials and performing initial processing. These steps are foundational in mold manufacturing, as they determine the durability and machining efficiency of the mold.
1. Mold Material Selection
Selecting the right mold material is critical as it directly impacts the mold’s lifespan and performance. In choosing materials, several factors need to be considered, including hardness, wear resistance, corrosion resistance, thermal conductivity, and cost. Common mold steels include P20, H13, and S136, each known for their high hardness and excellent wear resistance, making them suitable for demanding production environments.
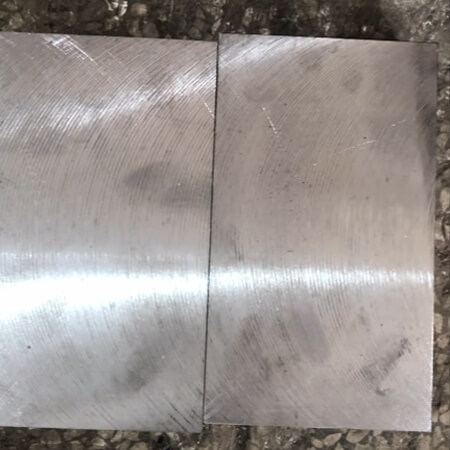
P20 steel is one of the most widely used mold steels, known for its good machinability and toughness, making it ideal for general plastic molds. H13 steel offers higher hardness and heat resistance, making it suitable for molds that must endure high temperatures and pressures, such as those used for metal injection molding. S136 steel, prized for its superior corrosion resistance and polishability, is often used for molds requiring high surface quality.
Material selection must balance cost and performance. For high-end eyewear molds, more expensive but superior materials may be chosen to ensure precision and durability. Conversely, for mid-range and low-end products, materials with better cost-effectiveness may be selected to reduce production costs. During the material selection process, designers also consider the machinability of the material to ensure it can be cut and shaped efficiently during subsequent processing.
Another key factor in material selection is availability. Some specialized materials may not be readily available on the market or may require longer procurement times. Designers must consider these practical issues to ensure that the chosen materials can be supplied on time, avoiding delays in the mold production schedule.
The following table provides a summary of different mold materials and their characteristics:
| Material | Hardness (HRC) | Wear Resistance | Corrosion Resistance | Thermal Conductivity | Machinability | Application Range | Cost |
|---|---|---|---|---|---|---|---|
| P20 | 28-32 | Medium | Low | High | Good | General plastic molds | Medium |
| H13 | 48-52 | High | Medium | Medium | Good | High-temp, high-pressure molds | High |
| S136 | 50-54 | High | High | Low | Fair | High surface quality molds | High |
2. Initial Cutting and Shaping
Once the material is selected, the next step is to cut the material into the approximate shape of the mold. Initial cutting and shaping represent the first stage of processing, transforming the raw material into the basic form of the mold. This stage typically involves sawing, turning, and milling, which are considered rough processing methods, but they lay the foundation for subsequent precision machining.
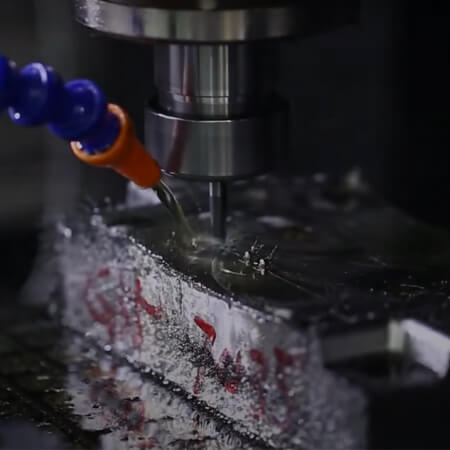
During the initial cutting process, operators must follow the design specifications precisely, using saws or CNC machines to cut the material into the required dimensions and shapes. Precision is crucial even at this rough stage, as excessive deviation could affect the quality of subsequent processing. During cutting, operators must also consider material shrinkage and deformation, especially when working with high-hardness materials, where controlling cutting forces and temperature is critical.
After shaping, the mold material will have its basic shape and dimensions, ready to be mounted on the machine for further precision machining. Although the mold shape at this stage remains rough, it provides a solid foundation for the detailed work that follows. The success of this stage directly influences the efficiency and quality of the ensuing processes.
During initial processing, it is also important to protect the material from damage, such as stress concentration or improper heat treatment, which could degrade the material’s properties. For example, the cutting process can generate significant heat, which, if not managed properly, could cause deformation or reduce the hardness of the material. Therefore, cooling fluids are typically used during cutting to keep the material at a stable temperature and maintain its mechanical properties.
IV. Precision Machining and Surface Treatment
Following initial processing, the mold enters the precision machining and surface treatment stages. These steps are critical in refining the mold to its final shape and size and ensuring its quality and durability.
1. Precision CNC Machining
Precision machining is the core of mold manufacturing and is typically carried out using CNC (Computer Numerical Control) machines. CNC machines can precisely cut mold materials according to the design drawings, shaping the mold to its final dimensions. The advantages of CNC machining lie in its high precision and efficiency, which allow for high-quality machining while significantly improving production efficiency.

During precision machining, operators must accurately program the CNC machine to ensure that the cutting tools follow the design specifications. CNC machines are often equipped with multi-axis linkage functions, enabling them to complete multi-faceted machining in a single setup, reducing the number of setups required and improving machining efficiency. Throughout the machining process, cutting parameters must be continuously monitored to ensure machining stability and precision.
In addition to CNC machines, Electrical Discharge Machining (EDM) is another common precision machining method, particularly suitable for complex geometries or deep cavities. EDM uses electrical sparks to erode the surface of the metal, making it ideal for areas of the mold that traditional machining methods cannot reach. With EDM, designers can carve intricate details into the mold material, ensuring that every part of the mold meets the design specifications.
The quality of precision machining directly impacts the mold’s final forming accuracy and product quality. Therefore, during the machining process, operators must strictly control every machining parameter, including cutting speed, feed rate, and cutting depth, to ensure the mold’s dimensional accuracy and surface quality. The waste materials and cutting fluids generated during machining must also be promptly cleared away to prevent them from affecting the machining results.
2. Surface Polishing and Treatment
The surface smoothness of the mold directly affects the quality of the final product. Therefore, after precision machining, the mold typically undergoes a polishing process. Polishing removes burrs and irregularities left from machining and enhances the mold’s smoothness, ensuring that plastic materials flow smoothly through the mold and reducing defects in the finished product.

The polishing process usually involves two steps: rough polishing and fine polishing. Rough polishing focuses on removing surface burrs and fine machining marks, leveling the surface of the mold. Fine polishing further improves the surface smoothness to achieve a mirror-like finish. Fine polishing typically uses ultra-fine abrasives and polishing liquids, with multiple repetitions to achieve a highly polished surface.
Surface treatment is also an essential step in mold manufacturing. Common surface treatment methods include chrome plating and nitriding, which enhance the durability and corrosion resistance of the mold, thereby extending its lifespan. For example, chrome plating forms a hard protective layer on the mold’s surface, preventing wear or corrosion during production. Nitriding, through chemical reactions, creates a layer of extremely hard nitrides on the mold’s surface, improving wear resistance.
The choice of surface treatment depends on the application environment of the mold and the client’s requirements. For high-precision, high-wear molds, a combination of multiple surface treatments may be necessary to ensure the mold’s stability and durability over extended use. In contrast, simpler molds may only require basic polishing or coating treatments to meet basic usage needs.
After surface treatment, the mold undergoes quality inspections to verify that the surface treatment meets expectations. For example, a microscope can be used to examine the uniformity and thickness of the surface treatment, or hardness tests can be conducted to confirm whether the mold’s hardness meets requirements. These inspections ensure the mold’s surface quality and durability, providing reliable support for subsequent production use.
V. Heat Treatment and Assembly
Following precision machining and surface treatment, the mold undergoes heat treatment and assembly. This phase is crucial for enhancing the mold’s hardness and toughness, as well as for assembling the various parts of the mold in preparation for trial molding and production.
1. Heat Treatment Process
Heat treatment is a critical step in improving the hardness and toughness of the mold. Through heating and cooling, the internal structure of the mold material changes, enhancing its resistance to wear and deformation. Common heat treatment methods include quenching and tempering. Quenching involves heating the mold to a high temperature and then rapidly cooling it, altering its internal structure to form a highly hard martensitic structure. Tempering is the process of reheating the quenched mold to a lower temperature, holding it for a certain period, and then cooling it slowly to eliminate the internal stresses generated during quenching, making the mold more stable.

During heat treatment, precise control over heating and cooling times and temperatures is essential, as improper control can degrade the mold’s performance. For example, if the cooling speed is too fast, the mold may crack, while prolonged tempering could reduce its hardness. Therefore, heat treatment is typically conducted in specialized equipment by experienced technicians to ensure mold quality.
After heat treatment, the mold undergoes hardness testing and microstructure analysis to verify that the heat treatment effects meet expectations. Hardness testing can be conducted using Rockwell or Vickers hardness testers to measure the hardness of the mold’s surface. Microstructure analysis uses a metallographic microscope to examine the internal structure of the mold, confirming whether the quenching and tempering effects have achieved the desired outcome. These inspections ensure the quality of the mold’s heat treatment, providing a reliable foundation for subsequent use.
2. Mold Assembly and Debugging
After heat treatment, the mold is ready for assembly. This step involves precisely fitting the various parts of the mold together to ensure seamless operation during production. During assembly, careful alignment and securing of the mold’s components are necessary to guarantee smooth cooperation between all parts. After assembly, the mold must undergo debugging to ensure it performs as expected in actual production.
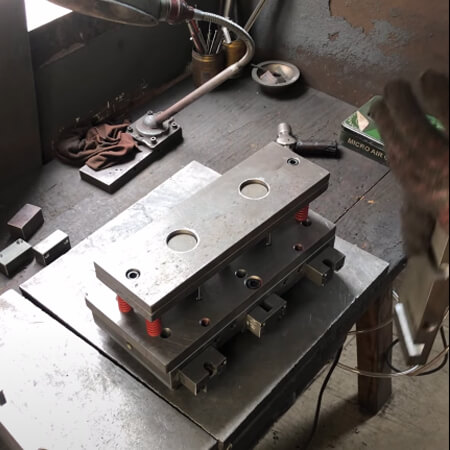
During debugging, multiple trial molds are typically conducted to produce samples and check the mold’s precision and production effectiveness. During the trial mold process, operators closely observe the dimensions, shape, and surface quality of the products, identifying and resolving potential issues. For instance, if product dimensions are incorrect, the mold may need minor adjustments, or if the surface quality is poor, the mold’s polishing and surface treatment may need to be reworked. Through multiple trials and adjustments, the mold’s performance indicators eventually meet design requirements, laying the foundation for mass production.
Mold assembly and debugging must also account for changes in the production environment, such as temperature, humidity, and machine stability, which may affect mold performance. Therefore, during actual production, fine-tuning the mold based on real-time conditions is necessary to achieve optimal performance. Once assembly and debugging are complete, the mold enters the production stage, providing stable and reliable support for mass production.
VI. Trial Molding and Quality Testing
Before the mold is put into full-scale production, it must undergo trial molding and quality testing to ensure that it meets all performance standards. These steps are critical in the mold manufacturing process, as they verify the quality of the design and manufacturing, ensuring that the mold will operate smoothly in production and produce high-quality products.
1. Trial Molding Process
Trial molding is a simulated production process used to identify potential issues with the mold under actual production conditions. The goal of trial molding is to verify that the mold’s design and machining meet the expected outcomes and to identify any potential issues that could affect production. During trial molding, operators follow the design drawings and process requirements to select appropriate materials and equipment and operate according to the actual production process. Trial molding allows observation of the mold’s performance under high temperatures and pressures and the quality of the formed products.
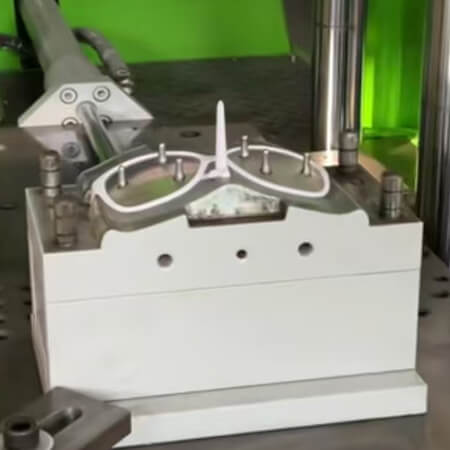
During the trial molding process, various problems may arise, such as incorrect product dimensions or poor surface quality. Designers and operators need to adjust and optimize the mold to address these issues. For example, if product dimensions are incorrect, minor adjustments to the mold may be needed, or injection parameters may need to be altered. If the surface quality is poor, the mold’s polishing and surface treatment may need to be reworked. Through multiple trials and adjustments, the mold’s performance indicators eventually meet design requirements, laying the groundwork for mass production.
Throughout the trial molding process, operators must document every step, including the parameters used and the results obtained. These records serve as valuable references for future production. For instance, by analyzing defects that occurred during trial molding, potential problems in production can be identified and addressed before full-scale production begins. Additionally, the experience gained during trial molding contributes to the further optimization and improvement of the mold.
2. Quality Testing
Quality testing is the final step in ensuring successful mold manufacturing. Precision measuring tools are used to inspect the dimensions and accuracy of both the mold and the trial mold samples to ensure they meet design specifications. Quality testing goes beyond dimensional checks, also evaluating the material properties, surface treatment effectiveness, and overall functionality of the mold. Only after passing stringent quality tests can the mold proceed to mass production.
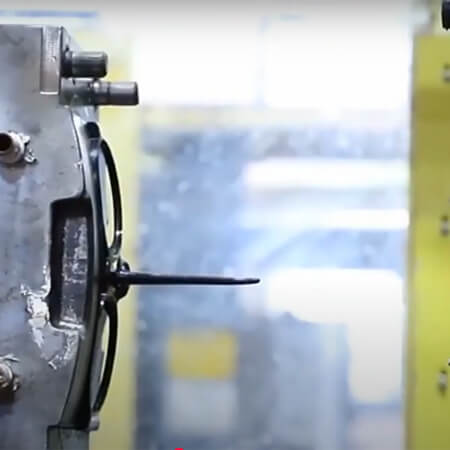
During quality testing, coordinate measuring machines (CMM) and other high-precision instruments are typically used to measure the critical areas of the mold, ensuring that its dimensions and shape align with design requirements. Additionally, the trial mold samples undergo mechanical property testing, wear resistance testing, corrosion resistance testing, and other evaluations to verify the material properties and surface treatment effectiveness. These tests ensure that the mold will perform consistently in production and produce high-quality products.
Besides physical property testing, functional testing of the mold is also necessary. This includes checking the smooth operation of the mold’s opening and closing, the flexibility of the ejector system, and the proper functioning of the cooling system. Functional tests ensure that the mold will operate reliably in actual production, minimizing the risk of machine downtime or production interruptions.
The final step in quality testing is typically a full dimensional inspection, where every aspect of the mold is thoroughly measured and recorded. These measurements serve as the mold’s quality certification, providing assurance to the client. If any issues are detected during testing, the mold can be adjusted or reworked as necessary, ensuring it is in optimal condition when it leaves the factory.
VII. Application and Maintenance of Finished Molds
While the manufacturing process for molds is complex, their application in production is even more critical. A mold can only be considered truly successful if it performs excellently in actual production. Once the mold is in use, it must be regularly maintained and serviced to ensure that it remains efficient and stable over its extended service life.
1. Application of Finished Molds
The application of finished molds spans a wide range, from high-volume industrial production to customized small-batch production, all relying on the support of molds. To ensure the mold’s stability during production, it is usually necessary to conduct another round of debugging and inspection before production begins, ensuring that the mold can maintain stable performance in a high-intensity production environment.

In actual production, operators must follow the design requirements and process flow to arrange the production schedule and ensure the mold’s normal operation. They must also adjust and optimize production parameters in real-time to address any issues that arise during production, such as modifying injection parameters or optimizing the cooling system to improve production efficiency and product quality. Through proper application, molds can achieve their maximum effectiveness in production, generating greater economic benefits for the company.
The application of molds in production must also consider environmental factors such as temperature, humidity, and machine stability, which can affect mold performance. Therefore, during actual production, it may be necessary to fine-tune the mold based on real-time conditions to ensure optimal performance. Once assembly and debugging are complete, the mold enters the production stage, providing stable and reliable support for mass production.
2. Maintenance and Care of Molds
During use, molds require regular maintenance and care. Daily maintenance includes cleaning the mold surface, checking the cooling system, and lubricating moving parts. Regular maintenance can extend the mold’s service life and reduce production downtime caused by mold failure.
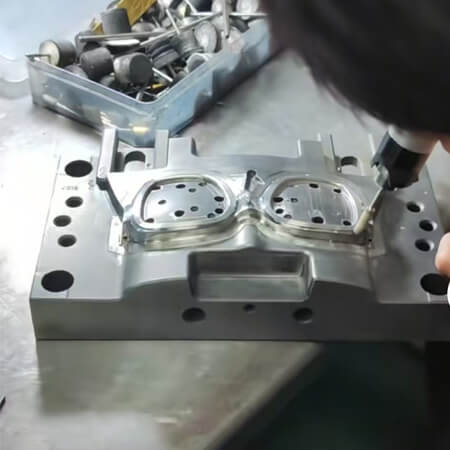
During mold maintenance, operators must regularly check the mold’s performance indicators and promptly identify and repair any issues. For example, if surface scratches or wear are detected, the mold may need to be repolished or undergo surface treatment. If the cooling system is found to be blocked or leaking, the cooling channels may need to be cleaned or replaced. Additionally, when the mold is not in use, it should be stored and protected properly to avoid damage from external environmental factors. Proper maintenance and care can significantly extend the mold’s service life, reduce production costs, and enhance the company’s competitiveness.
Maintenance should include detailed records of each inspection, including the issues found, the corrective actions taken, and the results after maintenance. These records serve as a reference for future maintenance and as a data source for mold improvement and optimization. In actual production, these records can be used to develop more scientific maintenance plans, further improving the mold’s stability and service life.
VIII. Conclusion
From design to finished product, the manufacturing process of eyewear molds is filled with technical and artistic ingenuity. Every step is crucial, determining the quality of the final product and its competitiveness in the market. As technology continues to advance, mold manufacturing is also evolving. The future of eyewear molds will be more precise and efficient, capable of meeting the ever-changing demands of the market. In this context, mold manufacturing companies must continually enhance their technical capabilities and production capacity to meet market challenges and opportunities. Only through continuous innovation and improvement can they remain competitive in a dynamic market.
Mold manufacturing is not just a technical process but also an art. Behind each mold lies the designer’s intelligence, the craftsman’s skill, and the team’s collaborative effort. By understanding the mold manufacturing process, we can better appreciate the complexity and craftsmanship involved in this industry. We hope this article provides you with a comprehensive perspective, helping you recognize the critical role of mold manufacturing in eyewear production.
IX. Appendix/References
- “Mold Design and Manufacturing” – Relevant technical materials and references
- Recommended Mold Design Software: AutoCAD, SolidWorks, Pro/E, etc.
- Recommended Precision Machining Equipment: CNC machines, EDM equipment, etc.
This article offers a detailed analysis of the eyewear mold manufacturing process, aiming to provide readers with a thorough understanding of this field’s technical and artistic essence.
Frequently Asked Questions (FAQ)
1. What is the role of molds in eyewear manufacturing?
Molds are essential tools in the eyewear manufacturing process. They determine the shape, size, and quality of the final product. The mold is responsible for shaping materials like plastic or metal into specific designs, ensuring that each eyewear piece meets precise specifications. Without a high-quality mold, achieving consistent product quality and design accuracy would be difficult.
2. What materials are commonly used in the manufacturing of eyewear molds?
Common materials used for eyewear molds include P20, H13, and S136 steel. These materials are chosen for their hardness, durability, wear resistance, and ability to withstand the high temperatures and pressures of the manufacturing process. P20 is often used for general plastic molds, while H13 is used for molds that endure higher temperatures, and S136 is preferred for molds requiring high surface polish and corrosion resistance.
3. How does the design phase impact the quality of the eyewear mold?
The design phase is critical as it lays the foundation for the entire mold manufacturing process. A well-designed mold ensures that the final product will have the desired shape, size, and functionality. It also influences the efficiency of the production process. The design includes careful consideration of factors like material flow paths, cooling systems, and parting lines, which are crucial for producing high-quality eyewear consistently.
4. What are the key steps involved in manufacturing an eyewear mold?
The key steps in manufacturing an eyewear mold include:
- Design Requirement Analysis: Understanding the client’s needs and translating them into a design.
- 3D Modeling: Creating a detailed three-dimensional model of the mold.
- Material Selection: Choosing the appropriate material for the mold based on durability and other factors.
- Initial Processing: Cutting and shaping the material into the basic form of the mold.
- Precision Machining: Refining the mold to its final shape and size using CNC machines.
- Surface Treatment: Polishing and applying coatings to enhance the mold’s durability.
- Heat Treatment: Strengthening the mold by altering its internal structure through controlled heating and cooling.
- Assembly and Debugging: Assembling the mold components and testing them to ensure they work together seamlessly.
- Trial Molding and Quality Testing: Running tests to ensure the mold produces parts that meet quality standards.
5. Why is precision machining so important in mold manufacturing?
Precision machining is vital because it directly impacts the final product’s accuracy and quality. High-precision machining ensures that the mold’s dimensions and surfaces are exact, which in turn ensures that the eyewear produced meets the required specifications. This step involves using advanced CNC machines and sometimes EDM (Electrical Discharge Machining) to achieve the necessary precision.
6. What is the purpose of surface treatment in mold manufacturing?
Surface treatment in mold manufacturing serves to enhance the mold’s durability and performance. Treatments like chrome plating and nitriding increase wear resistance and protect the mold from corrosion. Additionally, surface polishing ensures that the mold’s cavities are smooth, which is essential for producing high-quality finishes on the eyewear components.
7. How is the cooling system in a mold designed, and why is it important?
The cooling system in a mold is designed to efficiently remove heat from the mold after the material has been injected and formed. It is typically made up of channels through which coolant flows, located strategically around the mold’s critical areas. A well-designed cooling system is important because it reduces the cycle time of the production process and ensures consistent quality by preventing warping or other heat-related defects in the final product.
8. What happens during the trial molding process?
During the trial molding process, the mold is tested by running a series of production cycles to produce sample parts. These samples are then inspected for dimensional accuracy, surface finish, and overall quality. The trial molding process helps identify any potential issues with the mold or the production process, allowing for adjustments to be made before full-scale production begins.
9. How is the quality of a mold ensured before it is used in production?
The quality of a mold is ensured through a combination of trial molding and rigorous quality testing. This includes measuring the mold and its products for dimensional accuracy, checking for defects, and performing material and surface tests. Tools like Coordinate Measuring Machines (CMM) are used to verify that the mold meets all specifications. Any issues found are addressed before the mold is approved for production.
10. What maintenance is required for eyewear molds to ensure their longevity?
Regular maintenance is crucial for extending the life of an eyewear mold. Maintenance tasks include cleaning the mold surfaces, checking and maintaining the cooling system, lubricating moving parts, and inspecting for wear or damage. Additionally, molds should be stored properly when not in use to prevent environmental damage. Detailed maintenance records should be kept to track the mold’s condition and ensure timely repairs or adjustments.
11. How long does it typically take to manufacture an eyewear mold?
The time required to manufacture an eyewear mold can vary depending on the complexity of the design, the materials used, and the level of precision required. On average, the process can take anywhere from several weeks to a few months, including design, material selection, machining, assembly, and testing.
12. Can molds be used for different eyewear designs, or are they specific to one product?
Molds are typically designed for specific eyewear designs and are not easily adaptable to different products. This is because each mold is tailored to the exact dimensions, shape, and features of a particular design. While some components of a mold may be reused or modified for similar designs, creating a mold for a new product generally requires starting from scratch.
13. What are the most common challenges in eyewear mold manufacturing?
Some of the most common challenges in eyewear mold manufacturing include achieving high precision in complex designs, managing the cooling process to prevent defects, ensuring the durability of the mold under high production volumes, and maintaining consistent quality across multiple production runs. Additionally, balancing the cost of materials and production with the desired quality of the final product can be challenging.
14. How does technological advancement impact the eyewear mold manufacturing process?
Technological advancements have a significant impact on the eyewear mold manufacturing process. The introduction of more sophisticated CNC machines, 3D modeling software, and automated quality control systems has greatly improved the precision and efficiency of mold manufacturing. Additionally, new materials and surface treatment techniques have enhanced the durability and performance of molds, allowing for more complex designs and faster production cycles.
15. What is the importance of heat treatment in the mold manufacturing process?
Heat treatment is crucial in enhancing the mechanical properties of the mold, such as hardness and toughness. By altering the internal structure of the mold material through controlled heating and cooling, heat treatment increases the mold’s resistance to wear and deformation. This process ensures that the mold can withstand the high pressures and temperatures involved in the eyewear manufacturing process, thereby extending the mold’s service life and ensuring consistent product quality.
Receive Custom Guidance
Looking for the perfect custom eyewear to represent your brand?
Reach out to Eyewearbeyond for expert guidance on choosing the best materials, styles, and customizations for your eyewear collection!


