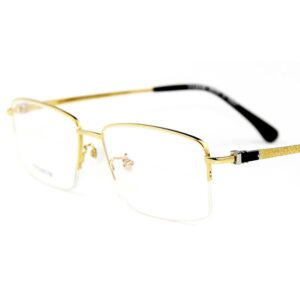
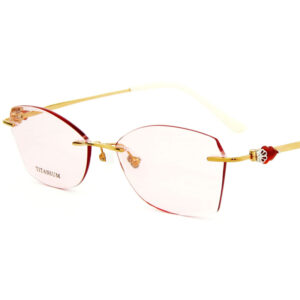
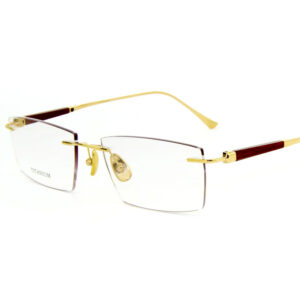
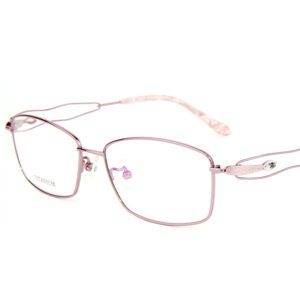
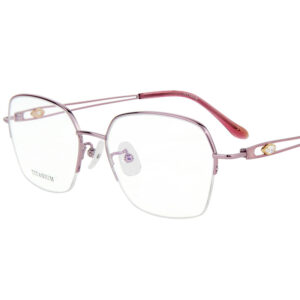
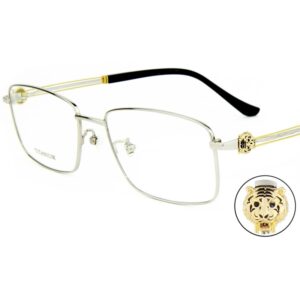
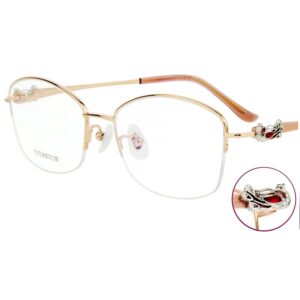
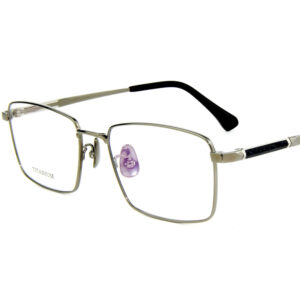
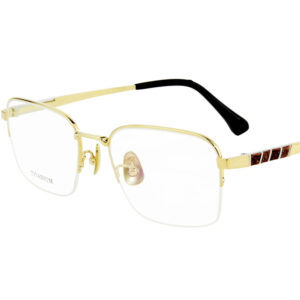
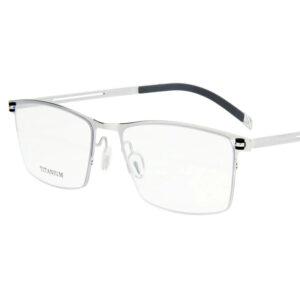
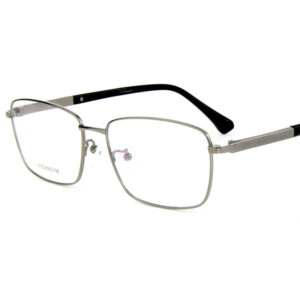
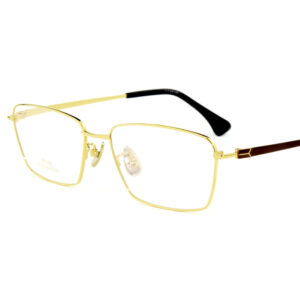
When it comes to eyewear, metal frames are a go-to choice for anyone who loves a classic, timeless look. Whether it’s the sleek shine of stainless steel or the lightweight feel of titanium, metal frames offer a mix of durability and style that’s hard to beat. But how exactly do these frames come to life? It’s a process that involves careful crafting, precision, and a lot of attention to detail. Let’s take a closer look at how metal eyewear frames are made, and I’ll share some insider tips on ensuring top-notch quality.
The Basics of Metal Frame Components
Before we get into the nitty-gritty, it’s important to understand that metal frames are made up of several key components. These include the rings (the part that holds the lenses), temples (the arms that rest on your ears), the bridge (which sits on your nose), arm pads, and hinges. Each of these parts plays a crucial role in the overall structure and comfort of the frames. So, the first step in creating metal eyewear is to individually manufacture these components, and that involves four main processes: shaping, grinding, cutting, and bending.
Shaping the Components
Now, let’s talk about how we actually shape these metal components. The metal rings, which are central to the frame, need to be precisely formed to hold the lenses securely. This is where CNC (Computer Numerical Control) machines come into play. These machines are incredibly precise, ensuring that each ring is exactly the right size. It’s kind of like using a high-tech cookie cutter to make sure every cookie (or in this case, ring) comes out perfectly uniform.
But not every part of the frame is made using CNC machines. For the other components—like the temples or bridges—we have a couple of options. We can either shape them manually or use an oil press machine with a mold. Each method has its advantages and disadvantages, and the choice really depends on what the order requires.
Oil Press with Mold vs. Manual Work
Using an oil press with a mold is great for accuracy and efficiency. It’s like having a custom-made mold that stamps out each piece perfectly every time. But there’s a catch: molds can be expensive. For example, creating a mold for the bridge might cost around $100, while molds for the temples can cost up to $600. If you’re only making a small batch of frames, the cost of these molds might not be worth it. In these cases, manual work could be the better option, even though it might not match the precision of a mold.
Manual work, on the other hand, offers flexibility, especially for smaller orders. Skilled craftsmen can shape the metal parts by hand, which is ideal when the order quantity is low, or the design doesn’t require the extreme precision that a mold provides. However, if you’re looking at a large order—say, over 1,000 pieces per model—using molds with an oil press becomes the more economical choice. The labor cost of manual work can skyrocket with larger quantities, making molds the better option for both quality and cost-efficiency.
Aside from the size of the order, the complexity of the component design also influences whether we use molds or manual methods. Simple designs can be made effectively either way, but for more intricate parts, molds are usually the best bet. A good manufacturer will analyze both the order size and the complexity of the components to recommend the most efficient and cost-effective method.
Trimming and Bending the Components
Once the components are shaped, they’re not quite ready to be assembled just yet. They often have sharp edges and burrs that need to be smoothed out, and that’s where trimming and polishing come in.
During the shaping process, the components are usually made slightly larger than necessary. This extra material gives us room to adjust and refine the parts to their final size. Trimming is all about cutting these components down to the precise dimensions needed for a perfect fit.
But there’s more to it than just trimming. Metal eyewear gets its sleek, curved look from the bending process. This is where the metal rings are bent to match the base curve of the lenses, ensuring that the lenses fit snugly into the frames. Other components are also bent to make sure the frames sit comfortably on the face and look great from every angle. The bending process requires both skill and precision because even a small mistake can throw off the fit and look of the final product.
Soldering and Assembling the Frame
Now that all the components are shaped, trimmed, and bent, it’s time to start putting everything together. This is where the metal parts—like the rims, bridges, end pieces, and arm pads—are soldered to form the front of the frame. The temples are then attached to the front with screws, completing the basic structure of the eyewear.
Two Soldering Methods: Laser vs. Traditional
Soldering is a critical step in assembling metal eyewear, and there are two main methods used: laser soldering and traditional soldering.
Laser Soldering: Laser soldering is a relatively new technique that’s gained popularity in industries like electronics, and it’s now making its mark in eyewear production as well. The beauty of laser soldering is its precision. It only heats the specific areas that need to be joined, leaving the rest of the metal surface untouched. This means less risk of warping or damaging the metal, and it results in a very clean finish with almost no visible traces of soldering. It’s the ideal method when you’re working with parts made from the same material, as it ensures a strong, seamless bond.
Traditional Soldering: While laser soldering is great, it’s not a one-size-fits-all solution. When you’re working with different types of metals—say, attaching steel arm pads to titanium rings—traditional soldering is still the go-to method. Traditional soldering uses a soldering iron to melt a filler metal that joins the parts together. It’s a bit messier and less precise than laser soldering, but it’s effective for joining different materials.
Regardless of which soldering method is used, the frames undergo ultrasonic cleaning afterward. This process removes any impurities or residues that might have been left behind during soldering. Any remaining traces of soldering are then cleaned by hand to ensure a flawless finish.
Assembling the Front and Temples
With the front of the frame and the temples ready, it’s time to bring them together. The temples are attached to the front of the frame using small screws, and once this is done, the basic structure of the eyewear is complete. At this stage, only the temple tips and nose pads are left to be added, but that comes later, after polishing and coloring.
Polishing: The Key to Quality
Polishing might not sound like a big deal, but trust me, it’s one of the most important steps in making metal eyewear. A well-polished frame not only looks better but also feels smoother and is more comfortable to wear. Polishing involves both tumbling and hand polishing, and a thorough inspection is done afterward to make sure everything is perfect. If the polishing isn’t done correctly, it can cause issues in the coloring process, leading to irreversible problems.
Tumbling Polish
The polishing process starts with tumbling. This is where the frames are placed in barrels filled with small stones designed specifically for polishing metals. These stones come in different sizes, and they work by gently smoothing out the metal surfaces as the barrels rotate. The worker in charge needs to keep an eye on the process and replace the stones as needed to ensure consistent results.
The tumbling process is broken down into three stages, each with a specific purpose:
- Rough Tumbling: In the first stage, large polishing stones are used to smooth out the rough edges left from the cutting and trimming process. This stage typically takes about 12 hours, depending on the material and design of the frame.
- Middle Tumbling: The second stage uses medium-sized stones to reach areas that the larger stones couldn’t. This stage is crucial for refining the surfaces of the frames, especially in areas with intricate details. It usually takes around 36 hours to complete.
- Shiny Tumbling: The final stage is all about giving the frames that perfect, shiny finish. The smallest stones are used in this stage, and the frames are tumbled for about 24 hours. This stage brings out the luster of the metal and prepares the frames for the coloring process.
Timing is everything in the tumbling process. If a frame spends too much or too little time in any stage, it can affect the final quality. To keep everything on track, we use a system where each barrel is labeled with the processing model number and start time. This, combined with a timer on each barrel, ensures that every frame goes through the process for the correct amount of time.
Hand Polishing
While tumbling does a great job of polishing the entire frame, there are always small, delicate areas that need a little extra attention. This is where hand polishing comes in. Workers use grinding wheels to carefully polish these areas, working with their hands and eyes to achieve the perfect finish.
Hand polishing takes longer than tumbling—on average, a worker can polish about 240 sets of eyewear per day, compared to 450 sets in a tumbling barrel. But the results are worth it. Hand polishing ensures that every inch of the frame is smooth, shiny, and ready for the next step. By combining tumbling and hand polishing, we get the best of both worlds: efficiency and high-quality results.
Inspecting the Polish
The quality of the polishing process is crucial because any tiny imperfections can become glaringly obvious once the frames are colored. Uneven surfaces, scratches, or rough spots can ruin the appearance of the frames and affect the durability of the color. And here’s the kicker: if the frames aren’t polished correctly, they can’t be fixed without stripping the color off the entire frame and starting over. That’s why we conduct a thorough inspection of the polish before moving on to the coloring process. Any frames that don’t meet our standards are sent back for re-polishing.
Coloring the Frames
Once the frames are polished to perfection, it’s time to add some color. The coloring process can be done in two ways: plating or spray painting. Each method has its own set of advantages and is chosen based on the desired look and durability.
Plating the Base Color
The first step in the coloring process is plating the base color. Plating involves coating the metal frames with a thin layer of another metal to give them a specific color. The most common base colors are gold, silver, and gunmetal, which are the natural colors of the metals used. Plating gives the frames a shiny, metallic finish that’s both durable and attractive.
Final Coloring
While the base colors look great, they’re often not enough to achieve the desired look. This is where the final coloring comes in. Depending on the design, we might add another layer of color through plating or spray painting.
Plating: For those who want a metallic finish, plating is the way to go. It offers a range of metal colors like rose gold or roman silver, as well as different shades of black, brown, and blue. Plating is durable and long-lasting, making it a popular choice for frames that need to withstand everyday wear and tear.
Spray Painting: If you’re looking for something more vibrant or need a two-tone design, spray painting is the better option. While it doesn’t last as long as plating, spray painting offers unlimited color options, making it perfect for colorful collections like kids’ eyewear. Plus, two-tone designs can only be achieved with spray painting, which typically takes about 12 days.
Color Inspection
After the frames are colored, they go through another round of inspection. This step is crucial because any imperfections in the polish will be magnified once the frames are colored. The inspection isn’t just about checking the color—it’s also about ensuring that the frames are smooth, even, and free from any defects. If any frames don’t pass the inspection, they’re sent back for color removal, re-polishing, and re-coloring.
Final Assembly
With the frames polished and colored, it’s time for the final assembly. This is where we add the non-metal parts, like temple tips, nose pads, and lenses, and finish up with silk printing and packaging.
Assembling Temple Tips and Nose Pads
Metal parts can be a bit uncomfortable when they come into direct contact with the skin, so we use silicone nose pads and either acetate or plastic for the temple tips. The nose pads are usually attached with screws, while the temple tips might require a bit of glue for a secure fit. Among the glue options, AB glue is the most durable, lasting much longer than instant glues. This ensures that the temple tips stay in place and provide comfort for the wearer.
Nylon Wire Insertion
For half-rim frames, nylon wire is used to support the lens where the metal doesn’t cover. This is a delicate process that requires precision, as the wire needs to be inserted perfectly to hold the lens securely. This step is done before the lenses are mounted.
Lens Cutting
Now it’s time to cut the lenses to fit the frames. Whether we’re working with optical lenses or sunglasses, the lenses need to be cut to match the shape and size of the frame. The lenses usually arrive from suppliers as round shapes with the required base curve. While white lenses are fairly universal, sunglasses lenses can vary greatly in terms of color, tint, and thickness. Many buyers prefer to use their trusted suppliers for sunglasses lenses to ensure consistency and quality.
Silk Printing
Silk printing is the final step in customizing the frames. This is where we add details like the brand name, logo, or frame size to the glasses. The outer side of the optical lens is ideal for printing the brand name, while the inner side of the left or right temple is perfect for the frame size. Small logos can also be added to the temples if desired. Silk printing not only adds a personal touch to the frames but also helps with branding and identification.
Mounting the Lenses
Mounting the lenses into the frames can be a bit tricky, especially for frames with unique designs. It’s important to follow the engineer’s instructions closely to avoid damaging the lenses or frames during this process. The lenses need to fit snugly into the frames without putting too much pressure on either the lens or the metal, which could cause cracks or warping.
Final Adjustment
The last step in the assembly process is making sure everything is perfectly aligned. This involves carefully adjusting the frame to match the engineer’s design, ensuring that the temples are even, the bridge sits correctly, and the lenses are properly positioned. Each endpoint of the open frame has to line up exactly with the scale drawing, ensuring a perfect fit and comfortable wear.
Quality Control – Factory Side
With the production process complete, it’s time for the final quality check. This is where we make sure that every frame meets the required standards before it’s shipped out. A smart manufacturer knows the importance of this step—catching any defects before the frames reach the buyer’s warehouse or go on sale can save a lot of headaches down the road. If any frames don’t pass the inspection, they’re sent back for rework, and if they can’t be fixed, they’re discarded.
Cleaning and Packaging
Once the frames pass the final inspection, they go through an ultrasonic cleaning process to remove any fingerprints, oil stains, or dust. This step ensures that the frames look pristine when they reach the customer. Workers wear white gloves during the packaging process to keep the frames clean and free from smudges.
The packaging process is straightforward but important. Here’s how it’s done:
- Open the frame and put a protective sleeve on the front.
- Put a sleeve on the left temple (or right temple) and then close it.
- Close the right temple (or left temple), which doesn’t require a sleeve.
- Pack the closed frame inside a poly bag, then place the bag in a box for shipping.
In recent years, more buyers are requesting eco-friendly materials for sleeves and poly bags, and we’re happy to accommodate those preferences. Sustainable packaging not only helps the environment but also appeals to eco-conscious consumers.
Customer Inspection
The final step before shipping is the customer’s inspection. Many buyers, especially those located far away, use third-party inspection companies to handle this. It’s a common practice in the eyewear industry, and there are plenty of reputable companies with experience in eyewear inspections.
Most inspections are done by AQL (Acceptable Quality Level) sampling, which involves checking a representative sample of the frames rather than inspecting each one individually. This method is efficient and effective, but if a buyer prefers a full inspection, they need to inform the manufacturer in advance. If the frames don’t meet the agreed-upon quality standards during the inspection, the manufacturer is responsible for fixing them until they pass the next inspection.
Conclusion
So, there you have it—a complete walkthrough of how metal eyewear frames are made. From shaping the components to final assembly, every step of the process requires precision, skill, and attention to detail. On average, it takes about 30 days to complete a metal eyewear order, but if you’re going for something special like a two-tone color design, it might take up to 45 days.
Even though I’ve covered all the key steps, there’s always more to learn about metal eyewear production. Each model has its own unique challenges, and mastering the craft requires continuous learning and experience. Metal eyewear production is a blend of art and science, and it’s all about refining the process to create high-quality, stylish frames that not only look good but also stand the test of time. Whether you’re a designer, a manufacturer, or a buyer, understanding these processes will help you appreciate the craftsmanship that goes into every pair of metal frames.
FAQ: Metal Eyewear Production
1. What materials are commonly used for metal eyewear frames?
The most common materials used for metal eyewear frames include titanium, stainless steel, aluminum, copper, and various alloys. Each material offers different benefits, such as lightweight durability, corrosion resistance, and flexibility.
2. How are metal eyewear components shaped?
Metal components like rings, temples, and bridges are typically shaped using CNC (Computer Numerical Control) machines for precision. Other parts can be shaped either manually or with an oil press machine using molds, depending on the order size and complexity of the design.
3. What is the difference between laser soldering and traditional soldering in metal eyewear production?
Laser soldering is a precise method that heats only the necessary areas, resulting in a clean, nearly invisible connection, ideal for parts made from the same material. Traditional soldering, on the other hand, is used when joining different types of metals, though it can be messier and less precise.
4. Why is polishing such an important step in metal eyewear production?
Polishing is crucial because it ensures that the metal frames are smooth, shiny, and free of imperfections. Proper polishing affects not only the look and feel of the frames but also the quality and durability of the coloring process. Any flaws in polishing can become very noticeable after coloring and are difficult to correct.
5. How are colors added to metal eyewear frames?
Colors are added through plating or spray painting. Plating involves coating the frames with a thin layer of metal, usually in colors like gold, silver, or gunmetal, which are durable but limited in variety. Spray painting offers a wider range of color options, including vibrant hues and two-tone designs, but is less durable than plating.
6. How long does it take to produce a set of metal eyewear frames?
The production timeline for metal eyewear typically ranges from 30 to 45 days, depending on the complexity of the design and any additional processes like two-tone coloring.
7. What are the steps involved in assembling metal eyewear frames?
The assembly process includes attaching the temples to the frame front, adding non-metal parts like temple tips and nose pads, inserting nylon wire for half-rim frames, cutting and mounting lenses, and performing silk printing for branding and sizing details.
8. How is quality control handled in metal eyewear production?
Quality control involves multiple inspections throughout the production process, including after soldering, polishing, and coloring. Frames that don’t meet the required standards are either reworked or discarded to ensure that only high-quality products reach the customer.
9. What is the final inspection process before metal eyewear frames are shipped?
The final inspection can be performed by the manufacturer or a third-party inspector hired by the customer. It usually involves AQL (Acceptable Quality Level) sampling to check a representative batch of frames. If full inspection is required, it must be arranged in advance, and the manufacturer is responsible for any rework needed if the frames don’t meet quality standards.
10. Can eco-friendly materials be used in the packaging of metal eyewear?
Yes, many buyers now request eco-friendly materials for packaging, including sleeves and poly bags. These sustainable options help reduce environmental impact and appeal to consumers who prioritize eco-friendly products.


